# Zabbix Agent
# Agent zabbix avec autoregistration
#### Prérequis
- Avoir un zabbix-server d'installé
#### Installation de zabbix agent
Le serveur que je vais ajouter est un serveur mariadb
- Installation via apt
```bash
apt install zabbix-agent2
```
- Editer le fichier de config `/etc/zabbix/zabbix_agent2.conf` et modifier:
Server=172.16.0.8
ServerActive=172.16.0.8
Hostname=zab-front-01
HostMetadata=Linux\_db
- Redémarrer le service
```bash
root@sql-front-01:~# systemctl restart zabbix-agent2.service
root@sql-front-01:~# systemctl status zabbix-agent2.service
* zabbix-agent2.service - Zabbix Agent 2
Loaded: loaded (/lib/systemd/system/zabbix-agent2.service; enabled; preset: enabled)
Active: active (running) since Wed 2023-12-06 15:44:55 UTC; 7s ago
Docs: man:zabbix_agent2
Main PID: 819 (zabbix_agent2)
Tasks: 6 (limit: 9395)
Memory: 4.1M
CPU: 28ms
CGroup: /system.slice/zabbix-agent2.service
`-819 /usr/sbin/zabbix_agent2 -foreground -c /etc/zabbix/zabbix_agent2.conf
Dec 06 15:44:55 sql-front-01 systemd[1]: zabbix-agent2.service: Deactivated successfully.
Dec 06 15:44:55 sql-front-01 systemd[1]: Stopped zabbix-agent2.service - Zabbix Agent 2.
Dec 06 15:44:55 sql-front-01 systemd[1]: Started zabbix-agent2.service - Zabbix Agent 2.
Dec 06 15:44:55 sql-front-01 zabbix_agent2[819]: Starting Zabbix Agent 2 (6.0.14)
Dec 06 15:44:55 sql-front-01 zabbix_agent2[819]: Zabbix Agent2 hostname: [zab-front-01]
Dec 06 15:44:55 sql-front-01 zabbix_agent2[819]: Press Ctrl+C to exit.
```
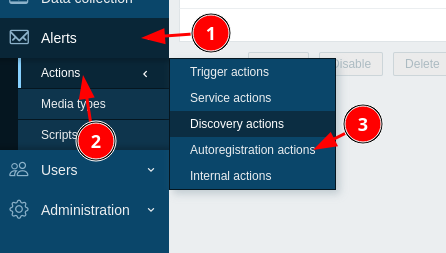
#### Paramétrer le serveur zabbix
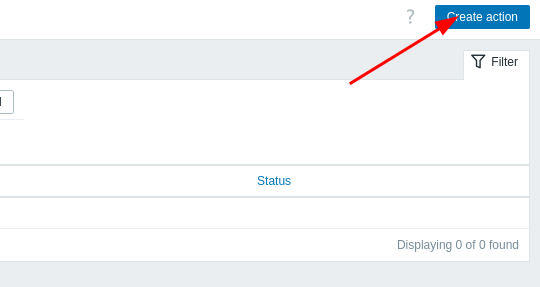
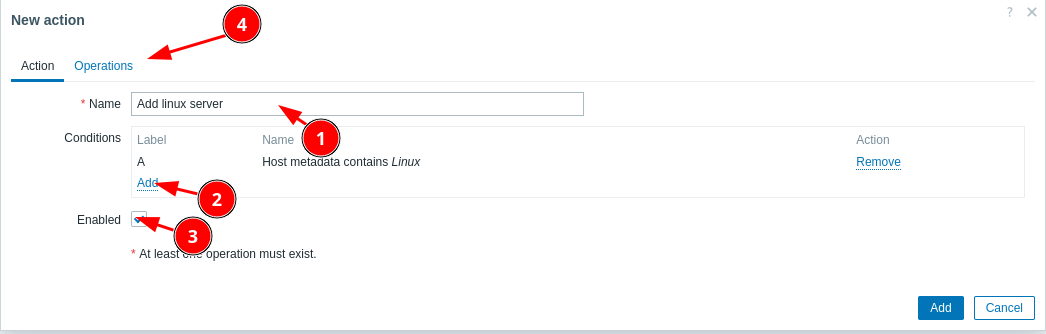
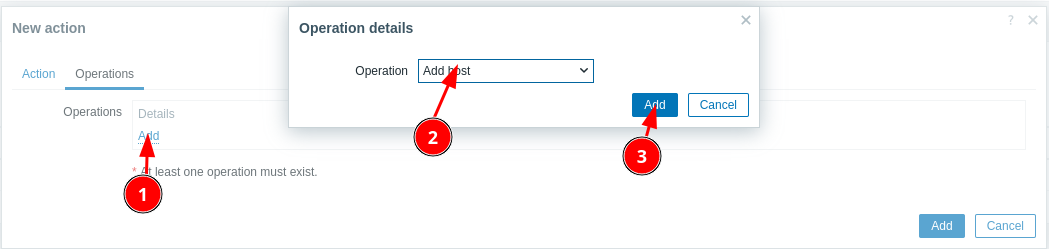
- Ajouter une action
[](https://book.techoops.fr/uploads/images/gallery/2023-12/fjTimage.png)
[](https://book.techoops.fr/uploads/images/gallery/2023-12/4g6image.png)
[](https://book.techoops.fr/uploads/images/gallery/2023-12/OIBimage.png)
[](https://book.techoops.fr/uploads/images/gallery/2023-12/SYnimage.png)
[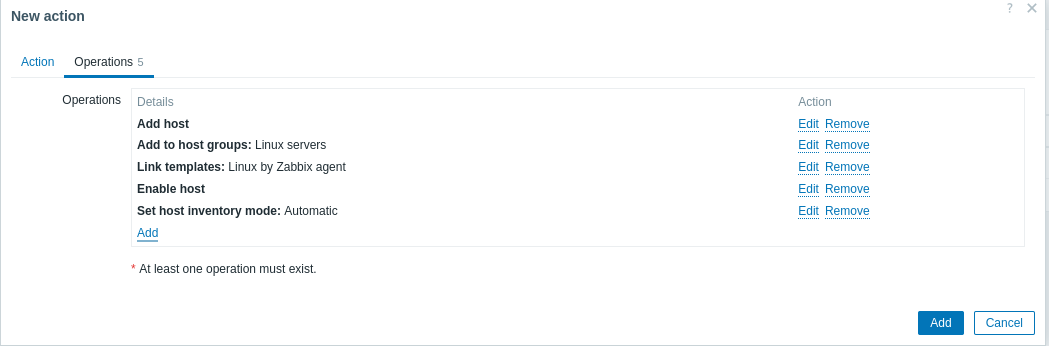](https://book.techoops.fr/uploads/images/gallery/2023-12/sYsimage.png)
- Attendre un peu et le le host est bien présent
[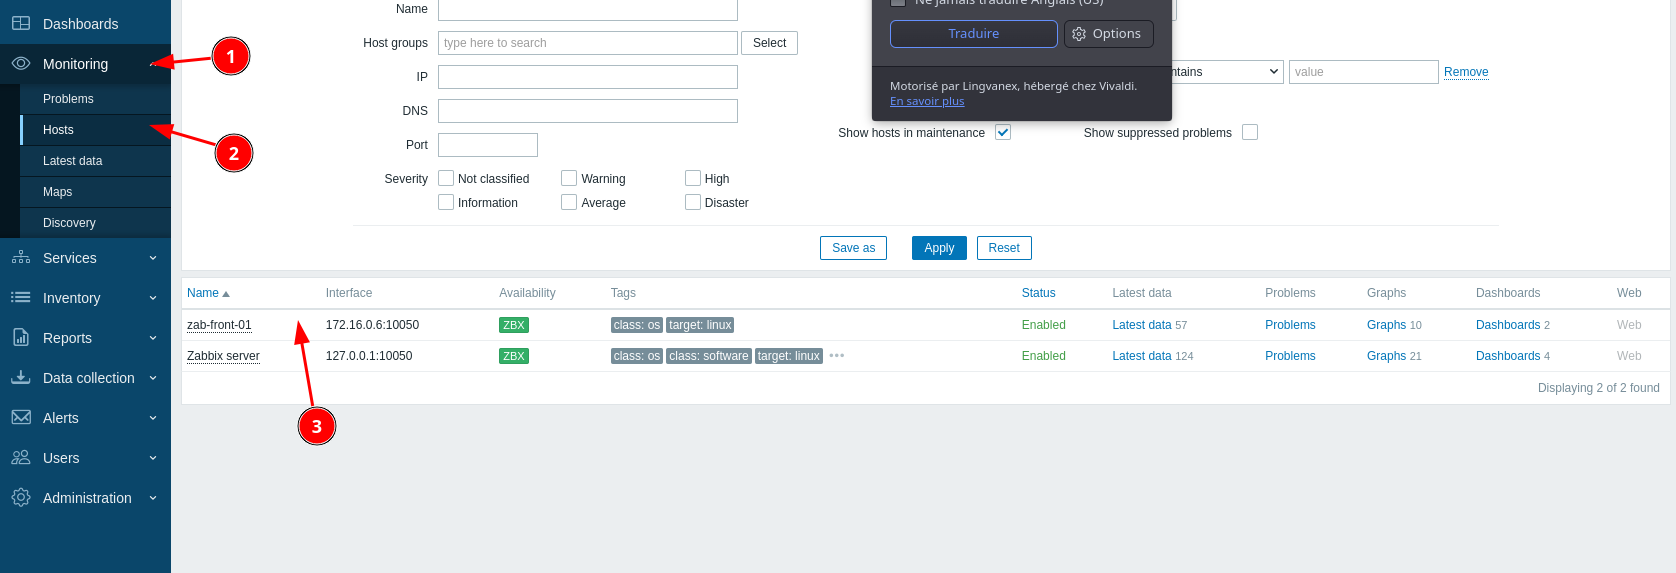](https://book.techoops.fr/uploads/images/gallery/2023-12/Mfjimage.png)
# WINDOWS SERVER CORE
Tout d'abord importer le package .msi de Zabbix Agent sur le Serveur Windows Core.
Le plus simple : créer un dossier partager et importer le fichier depuis le premier serveur AD.
- **Sur le Windows Core** (à modifier avec vos préférences):
```
New-Item "C:\SharedFolder" -itemType Directory
```
```
New-SmbShare -Name SharedFolder -Path "C:\SharedFolder" -FullAccess "Tout le monde"
```
**Depuis le ad-front-01**
[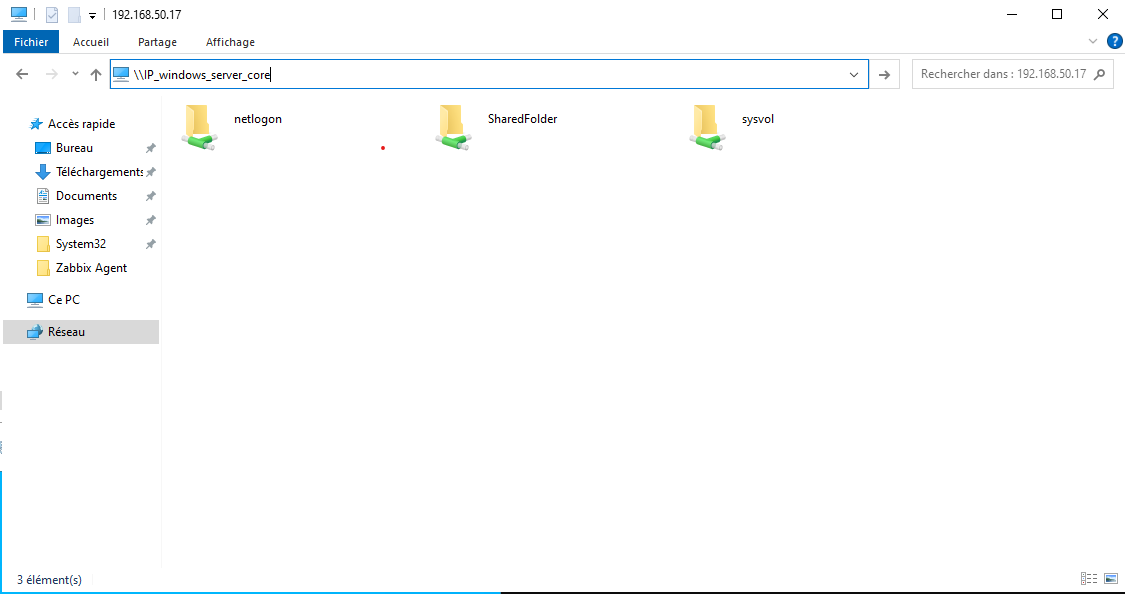](https://book.techoops.fr/uploads/images/gallery/2023-12/2Hyimage.png)
- **Sur Windows Core**, exécuter le package .msi et suivre l'installation. (à modifier si besoin)
```
msiexec.exe /i C:\SharedFolder\zabbix_agent-6.4.10-windows-amd64-openssl.msi
```
- Maintenant faire les modifications nécessaires sur le fichier de conf
```
notepad 'C:\Program Files\Zabbix Agent\zabbix_agentd.conf'
```
**IMPORTANT** : Le serveur de monitoring doit être renseigner avec le domaine donc : zab-front-01.megaproduction.local
- Autoriser le pare-feu de Windows a communiquer avec le serveur **A EXECUTER EN POWERSHELL**
```
netsh advfirewall firewall add rule name="ICMP Allow incoming V4 echo request" protocol="icmpv4:8,any" dir=in action=allow
```
```
netsh advfirewall firewall add rule name="Open Port 10050" dir=in action=allow protocol=TCP localport=10050
```
- Enfin redémarrer le service et vérifier si Zabbix reçoit bien les données.
```
Restart-Service 'Zabbix Agent'
```
*Divers*
- Le fichier de log , utile pour comprendre le problème
```
notepad 'C:\Program Files\Zabbix Agent\zabbix_agentd.log'
```