Actuellement en créant une machine et en lui affectant pour switch vmbr1, cette dernière n'aura accès qu'au machines connectée sur ce même switch. Pour que les machines soit isolée sur un réseau local mais qu'elles aient un accès à internet, on peut mettre en place un firewall. Je vous propose de suivre le tutoriel suivant pour la mise en place du firewall [OPNSENSE](https://book.techoops.fr/books/firewall-linux/page/installation-sur-proxmox "OPNsense").
# Installation d'une VM ### Installation d'une VM Debian 12 sur Proxmox. #### Prérequis: - Avoir un serveur Proxmox - Avoir un ISO de la dernière version de Debian (Version 12, Bookworm actuellement). On peut trouver l'ISO [Ici.](https://cdimage.debian.org/debian-cd/current/amd64/iso-cd/debian-12.0.0-amd64-netinst.iso "Latest deb version") 1. Upload de L'ISO sur le serveur. [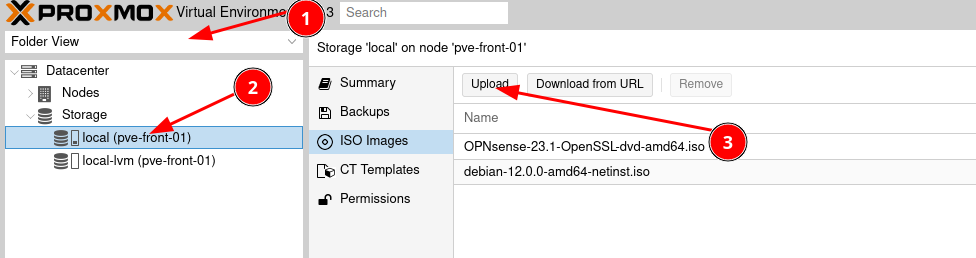](https://book.techoops.fr/uploads/images/gallery/2023-06/X7qimage.png) [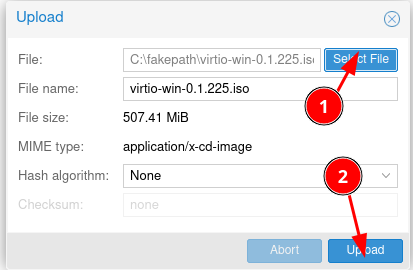](https://book.techoops.fr/uploads/images/gallery/2023-06/vQMimage.png) [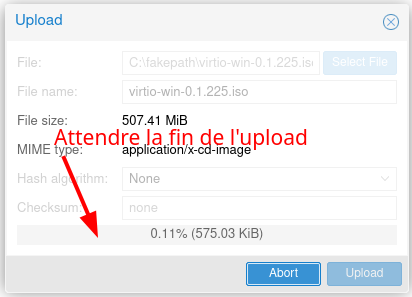](https://book.techoops.fr/uploads/images/gallery/2023-06/vxNimage.png) 2. Création de la VM. [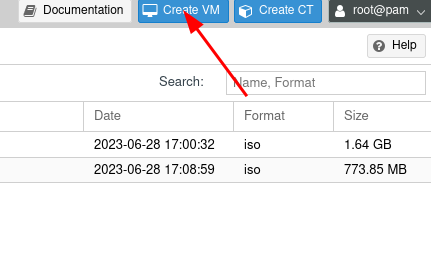](https://book.techoops.fr/uploads/images/gallery/2023-06/NGsimage.png) - Nommer sa VM [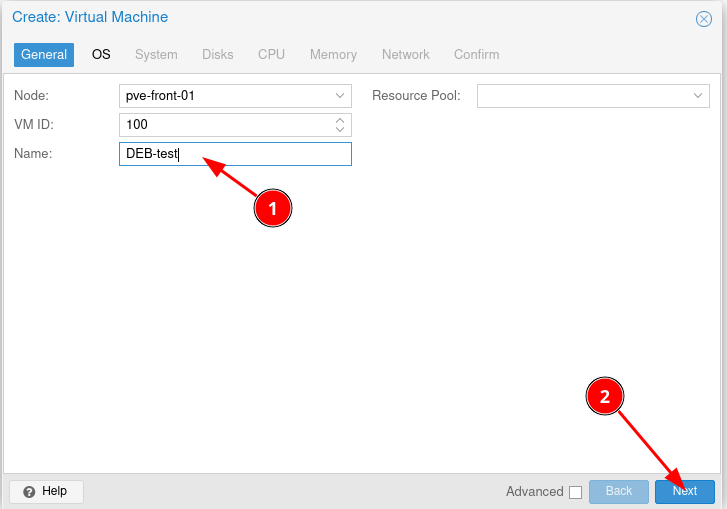](https://book.techoops.fr/uploads/images/gallery/2023-06/PzPimage.png) - Sélection de l'OS et de l'ISO [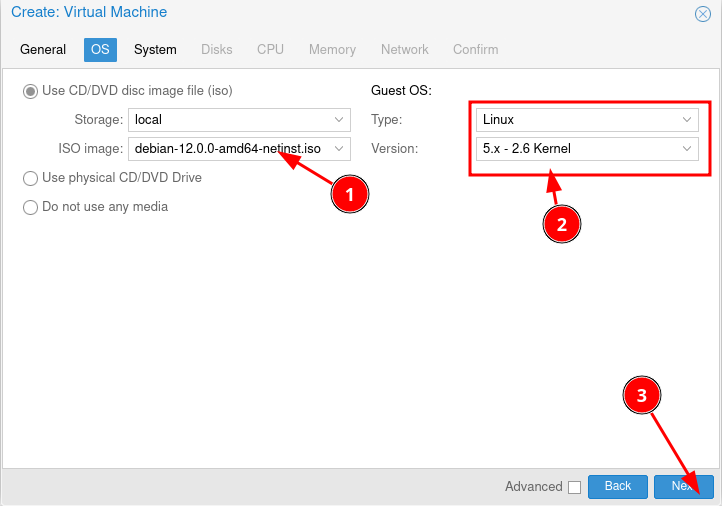](https://book.techoops.fr/uploads/images/gallery/2023-06/CWGimage.png) - Sur la partie système faites Next. - Définition de la taille du disque mettre 8Go (c'est un test pas de la production) [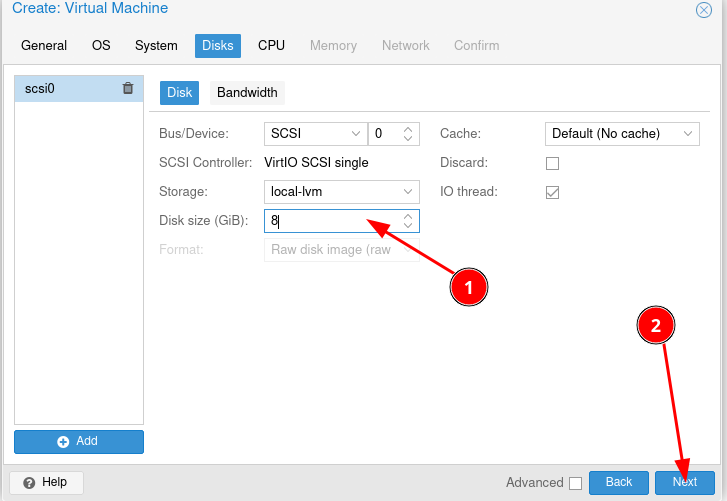](https://book.techoops.fr/uploads/images/gallery/2023-06/oPmimage.png) - Choisissez le nombre de CPU et de coeurs souhaitées (en modifiant les CPU j'ai déjà eu des soucis préférer la modification des cœurs). - Définir la mémoire souhaitée (1024 fera très bien l'affaire pour ce test). - Connecter la future machine sur un switch pour ce test définir le switch sur vmbr0 ainsi le réseau sera le même que le serveur Proxmox. - On peut cocher la case start after created pour démarrer la Vm directement. [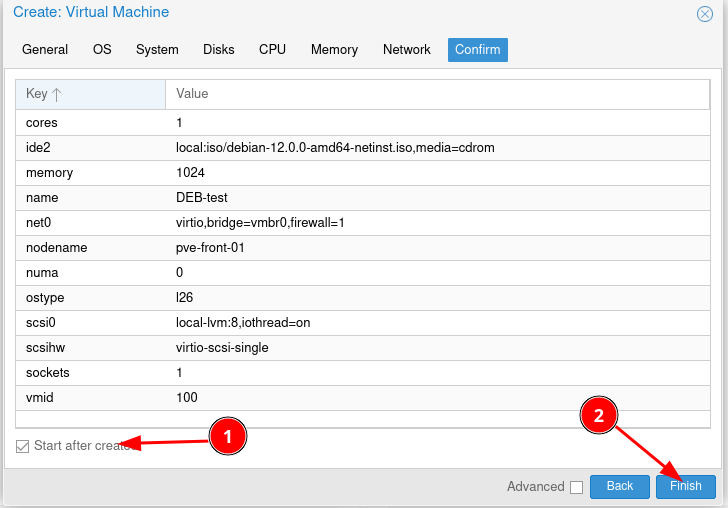](https://book.techoops.fr/uploads/images/gallery/2023-06/1sUimage.png) 3. Accès à la VM. - Soit par la console web. [](https://book.techoops.fr/uploads/images/gallery/2023-06/iC9image.png) - Soit accès en SSH avec l'IP du serveur. ```bash kvega@fr-lap10398 ~ ssh kvega@192.168.1.74 The authenticity of host '192.168.1.74 (192.168.1.74)' can't be established. ED25519 key fingerprint is SHA256:ABGWoRK+euXlyaXS6QPac0ta378u/5dAsCqJ3EnfuQU. This key is not known by any other names Are you sure you want to continue connecting (yes/no/[fingerprint])? yes Warning: Permanently added '192.168.1.74' (ED25519) to the list of known hosts. kvega@192.168.1.74's password: Linux debian-test 6.1.0-9-amd64 #1 SMP PREEMPT_DYNAMIC Debian 6.1.27-1 (2023-05-08) x86_64 The programs included with the Debian GNU/Linux system are free software; the exact distribution terms for each program are described in the individual files in /usr/share/doc/*/copyright. Debian GNU/Linux comes with ABSOLUTELY NO WARRANTY, to the extent permitted by applicable law. Last login: Wed Jun 28 18:03:03 2023 kvega@debian-test:~$ su - Mot de passe : root@debian-test:~# ```Si vous choisissez le SSH il faudra vous connecter avec l'utilisateur que vous avez créé pendant l'installation et récupérer l'IP du serveur.
Voilà votre première Vm est créée !!
# AJOUT DE STOCKAGE #### Prérequis - Avoir un proxmo - Avoir de l'espace sur son disque #### Ajout du disque sur le logiciel de virtualisation - Ajout du disque [](https://book.techoops.fr/uploads/images/gallery/2023-11/EnVimage.png) [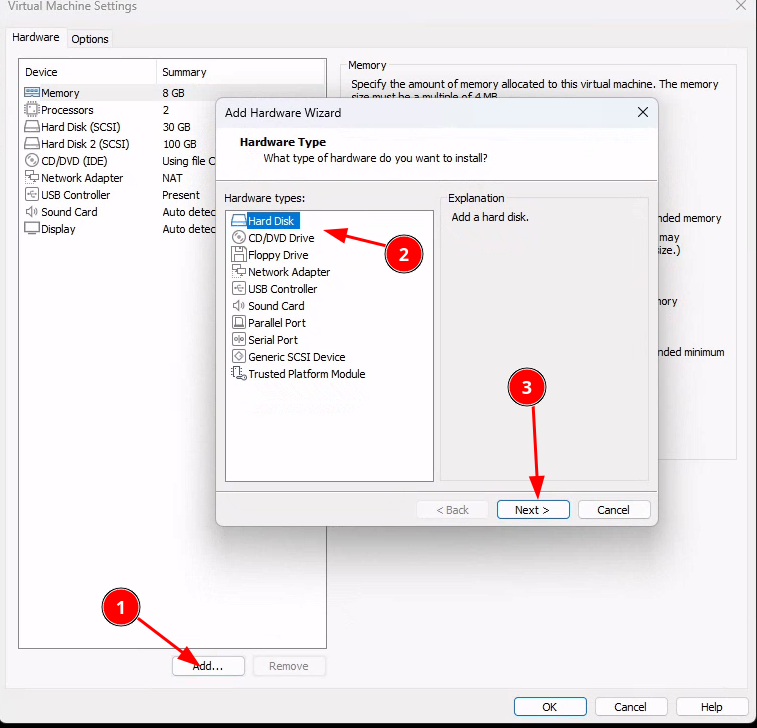](https://book.techoops.fr/uploads/images/gallery/2023-11/UQFimage.png) [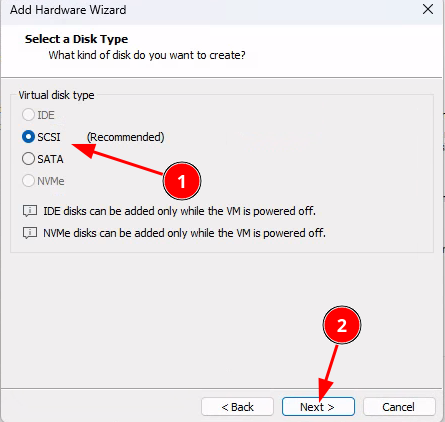](https://book.techoops.fr/uploads/images/gallery/2023-11/vX6image.png) [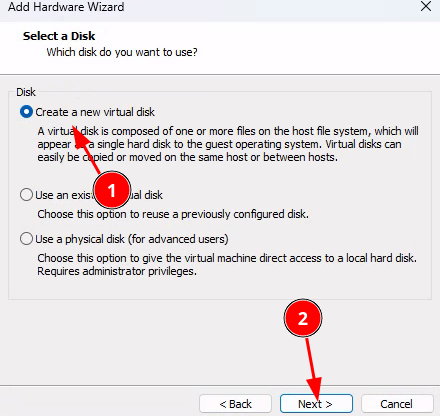](https://book.techoops.fr/uploads/images/gallery/2023-11/s1Cimage.png) [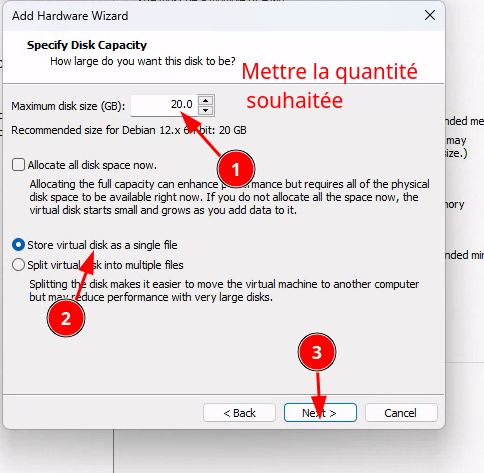](https://book.techoops.fr/uploads/images/gallery/2023-11/h1kimage.png) [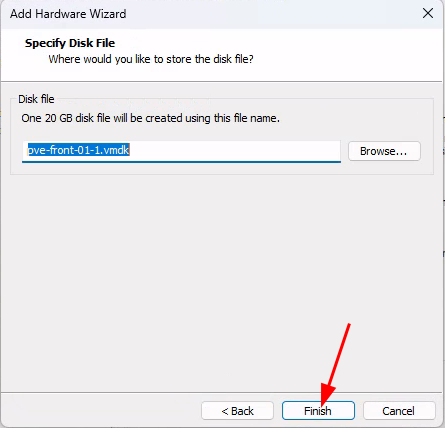](https://book.techoops.fr/uploads/images/gallery/2023-11/WNYimage.png) - Redémarrez le serveur Proxmox - Paramétrez le nouveau disque dans la console web de Proxmox - Vérifiez que le disque est visible [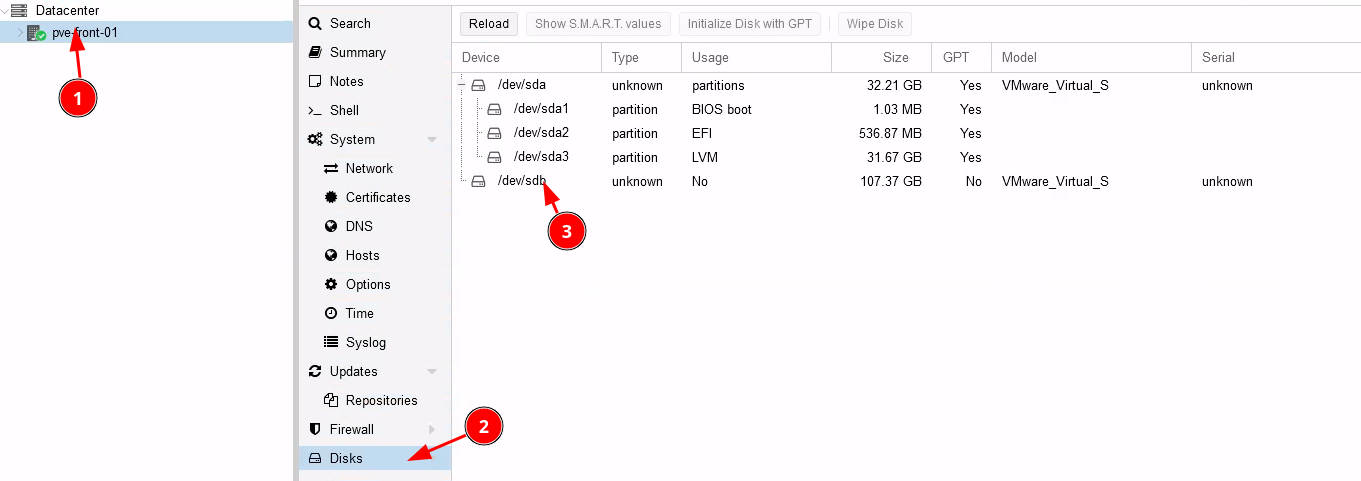](https://book.techoops.fr/uploads/images/gallery/2023-11/bcNimage.png) - Paramétrez le nouveau disque en ZFS afin qu'il puisse servir de stockage pour les VMS [](https://book.techoops.fr/uploads/images/gallery/2023-11/52limage.png) [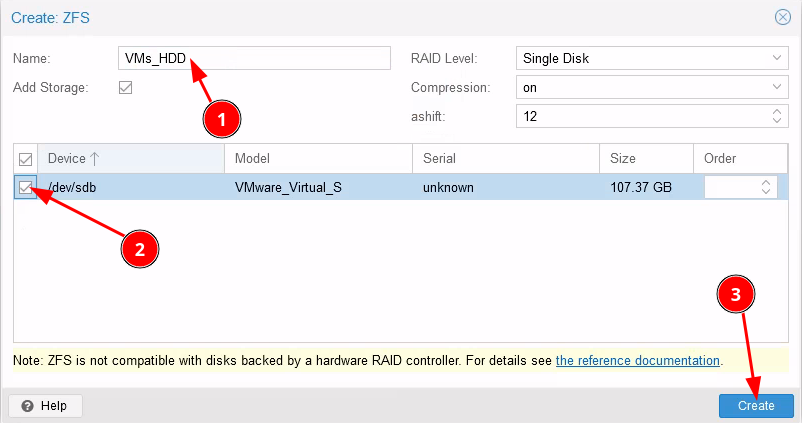](https://book.techoops.fr/uploads/images/gallery/2023-11/Bveimage.png)[](https://book.techoops.fr/uploads/images/gallery/2023-11/U2rimage.png) **Le disque est créé !!**
# 2- Initialisation d'un cluster Proxmox ### Prérequis: - Avoir au moins 3 hyperviseurs Proxmox - Chaque Hyperviseur doit être accessible sur le réseau - Une seconde interface réseau connectant les serveurs entre eux #### Schéma: [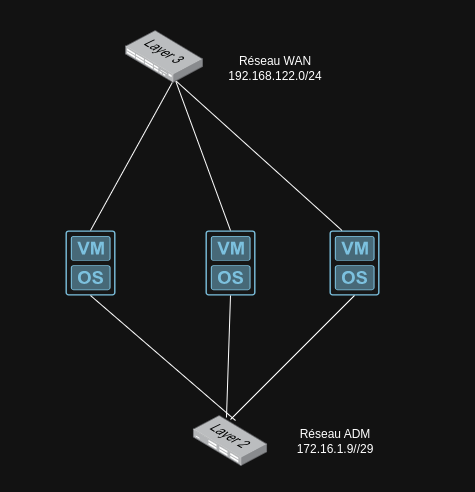](https://book.techoops.fr/uploads/images/gallery/2025-05/image.png) ### Mise en place du réseau ADM: 1. Ajout du switch virtuel sur chaque Proxmox [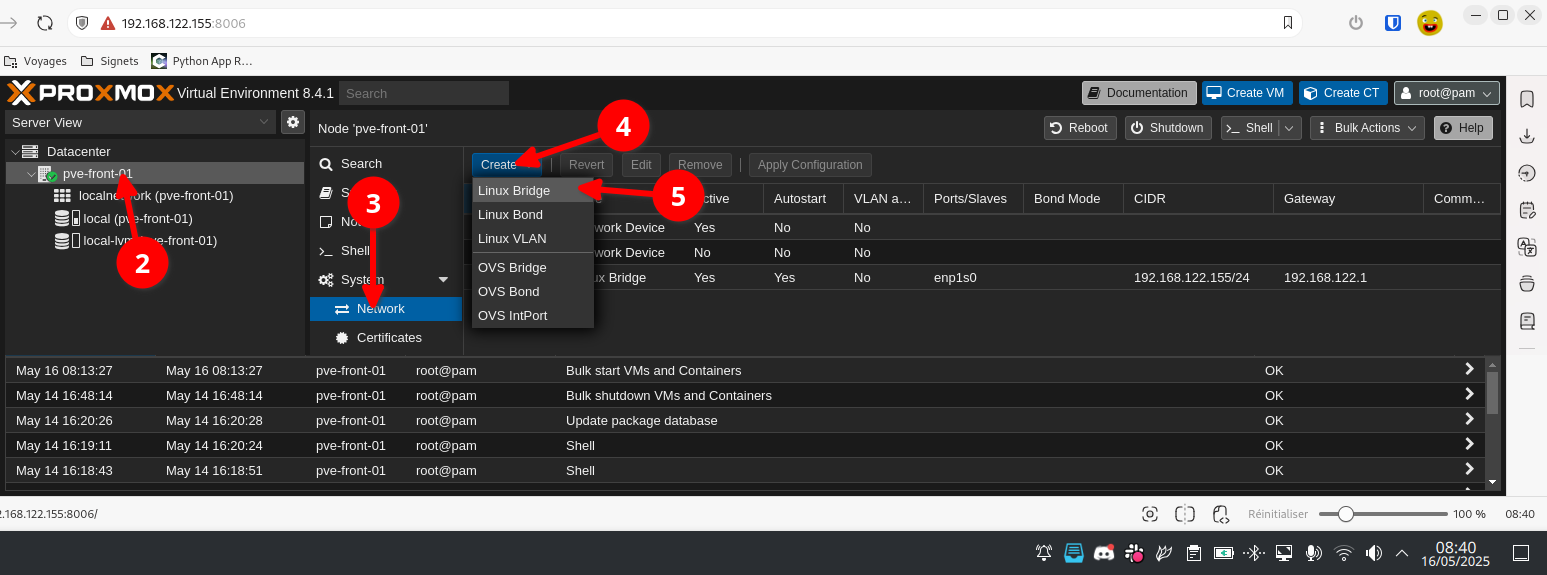](https://book.techoops.fr/uploads/images/gallery/2025-05/SZBimage.png) [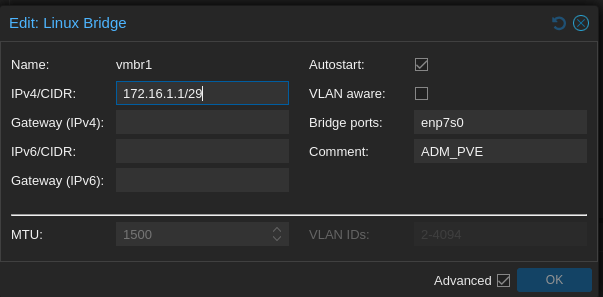](https://book.techoops.fr/uploads/images/gallery/2025-05/sdhimage.png) [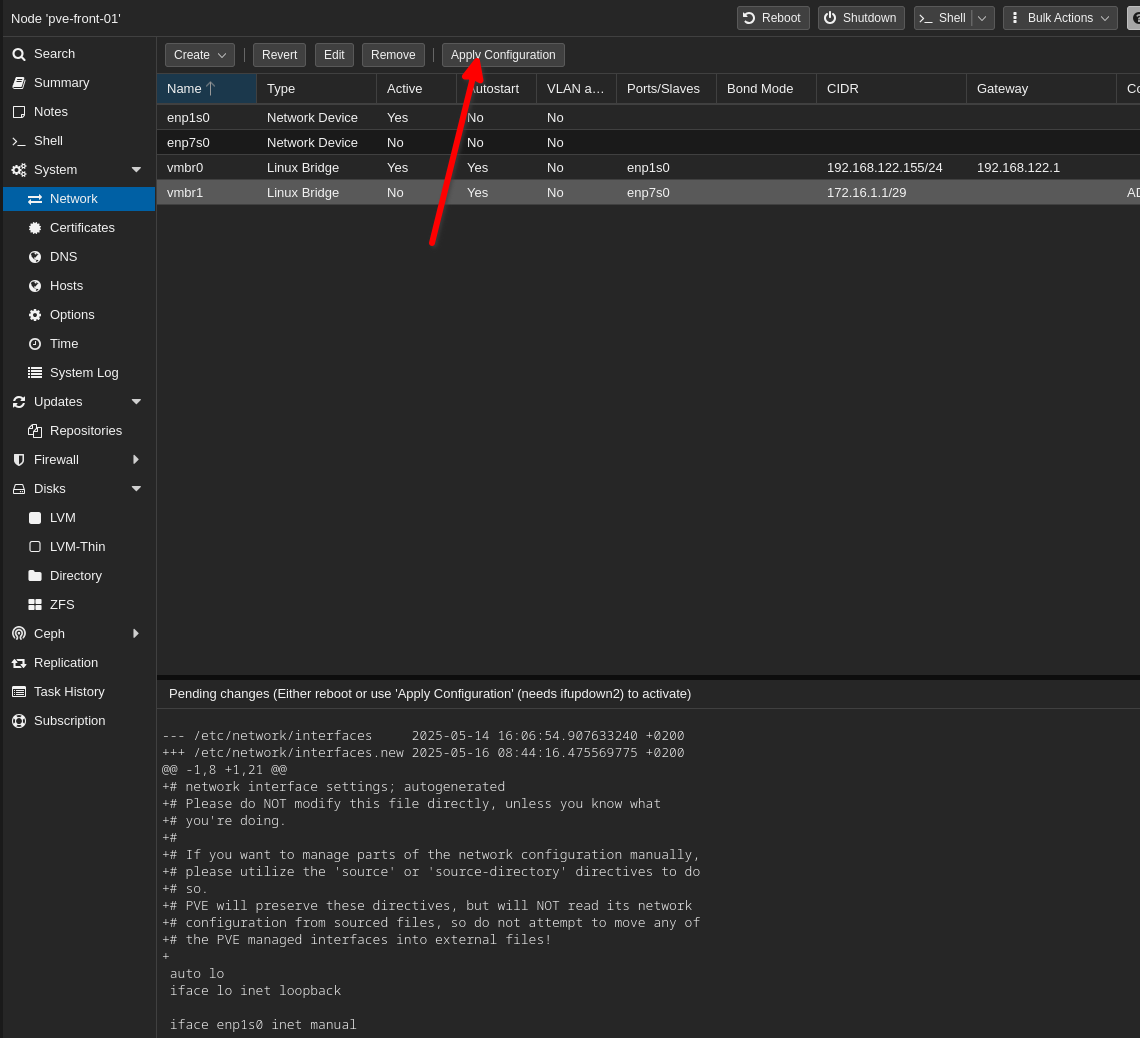](https://book.techoops.fr/uploads/images/gallery/2025-05/DkUimage.png) 2. Test de la connectivité entre les Proxmox ```bash root@pve-front-01:~# ping -c1 172.16.1.2 PING 172.16.1.2 (172.16.1.2) 56(84) bytes of data. 64 bytes from 172.16.1.2: icmp_seq=1 ttl=64 time=0.279 ms --- 172.16.1.2 ping statistics --- 1 packets transmitted, 1 received, 0% packet loss, time 0ms rtt min/avg/max/mdev = 0.279/0.279/0.279/0.000 ms root@pve-front-01:~# ping -c1 172.16.1.3 PING 172.16.1.3 (172.16.1.3) 56(84) bytes of data. 64 bytes from 172.16.1.3: icmp_seq=1 ttl=64 time=0.238 ms --- 172.16.1.3 ping statistics --- 1 packets transmitted, 1 received, 0% packet loss, time 0ms rtt min/avg/max/mdev = 0.238/0.238/0.238/0.000 ms root@pve-front-01:~# ``` ### Mise en place du cluster 1. Initialisation du cluster [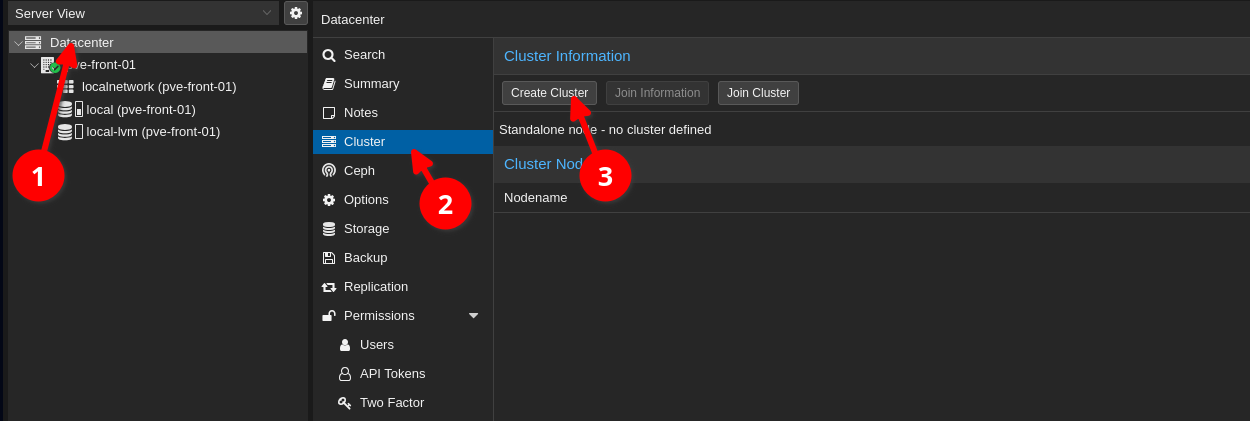](https://book.techoops.fr/uploads/images/gallery/2025-06/image.png) 2. Nomage du cluster [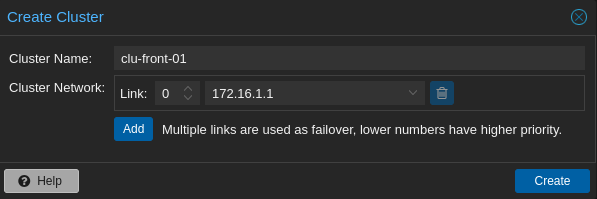](https://book.techoops.fr/uploads/images/gallery/2025-06/KhSimage.png) Attendre que le processus soit terminé 3. Récuperer les informations de jonction les notés dans un endroit sûr. [](https://book.techoops.fr/uploads/images/gallery/2025-06/Hgnimage.png) 4. Joindre les noeud au cluster [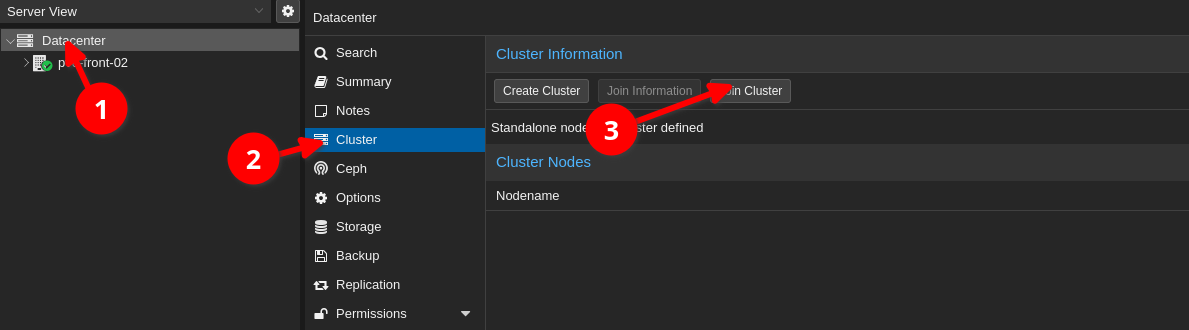](https://book.techoops.fr/uploads/images/gallery/2025-06/l50image.png) [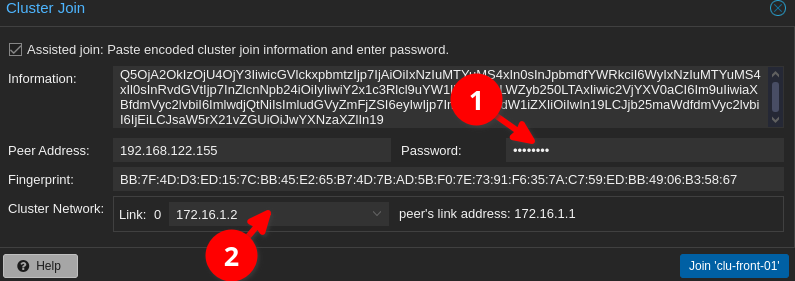](https://book.techoops.fr/uploads/images/gallery/2025-06/56aimage.png) 5. Ajouter tout les cluster [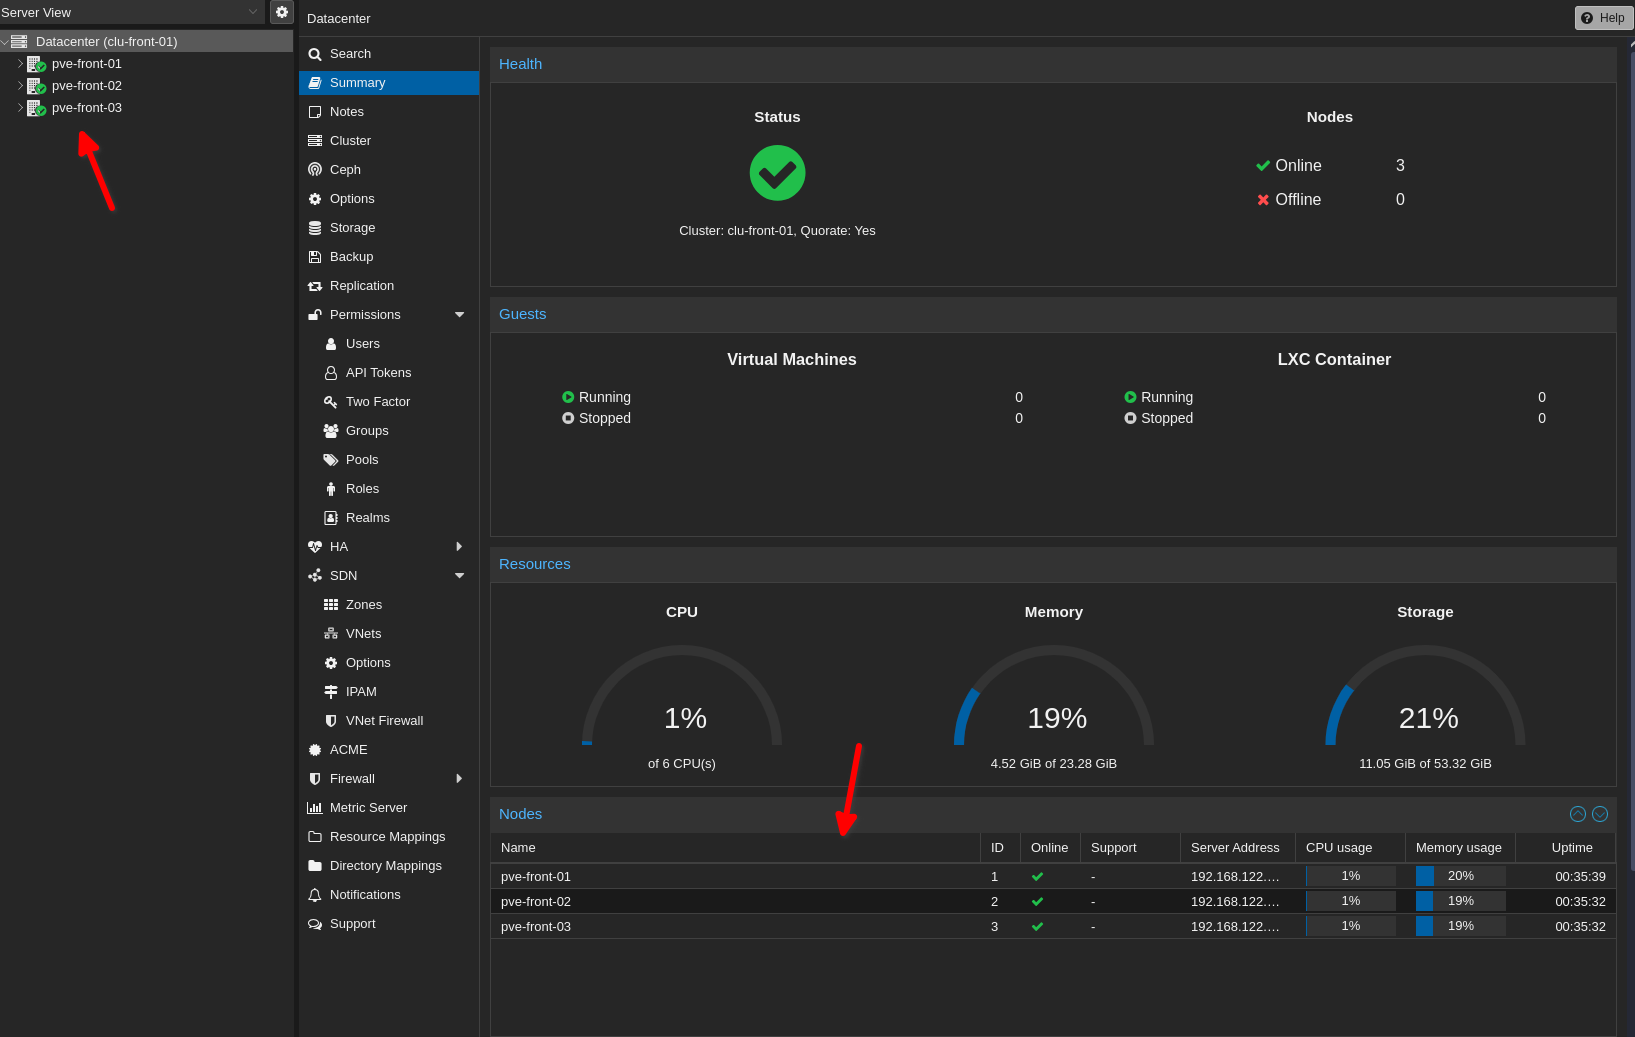](https://book.techoops.fr/uploads/images/gallery/2025-06/ynUimage.png) # 3 - Installation du réseau (Privé) ### Prérequis: - Avoir un cluster Proxmox - Avoir branché un câble spécifique sur chaque nœud pour le réseau LAN. ### Mise en place du réseau LAN: 1. Ajout du switch virtuel sur chaque nœuds: [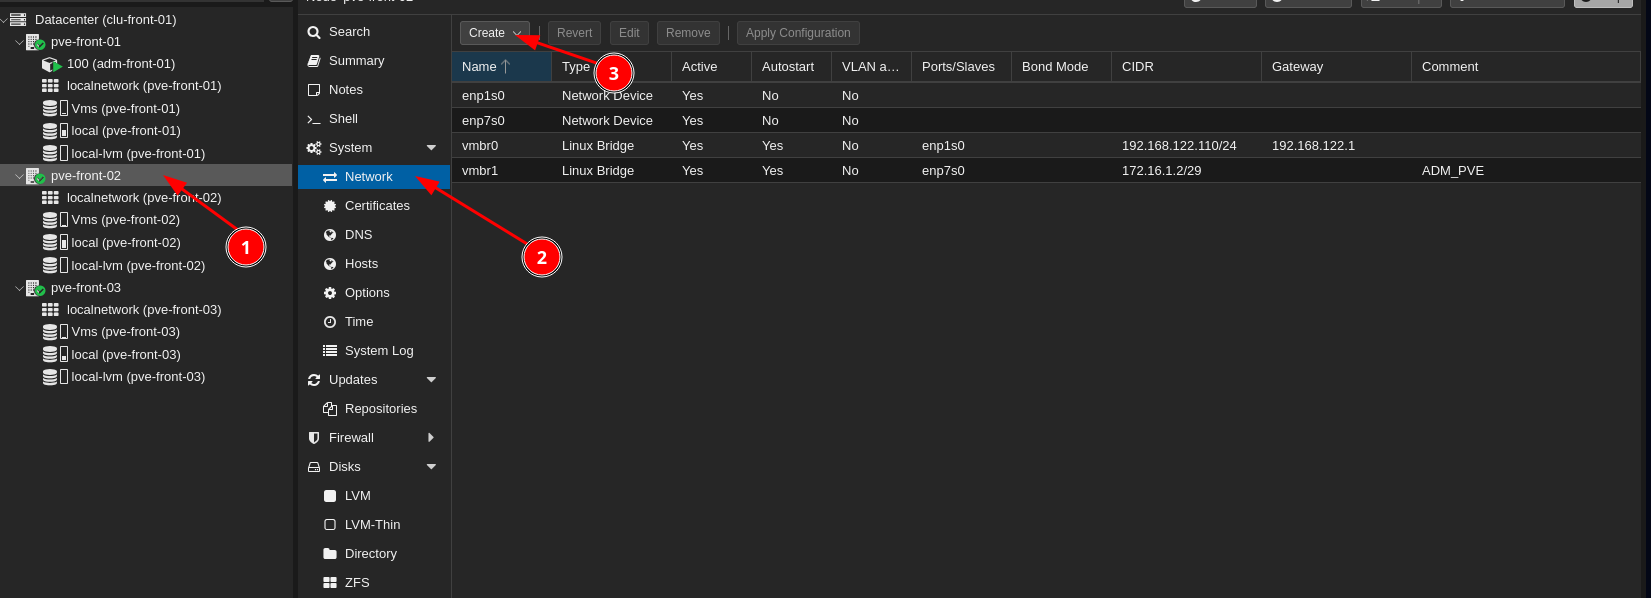](https://book.techoops.fr/uploads/images/gallery/2025-07/image.png) [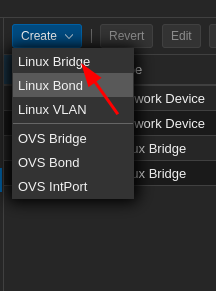](https://book.techoops.fr/uploads/images/gallery/2025-07/v2Himage.png) [](https://book.techoops.fr/uploads/images/gallery/2025-07/IJKimage.png) [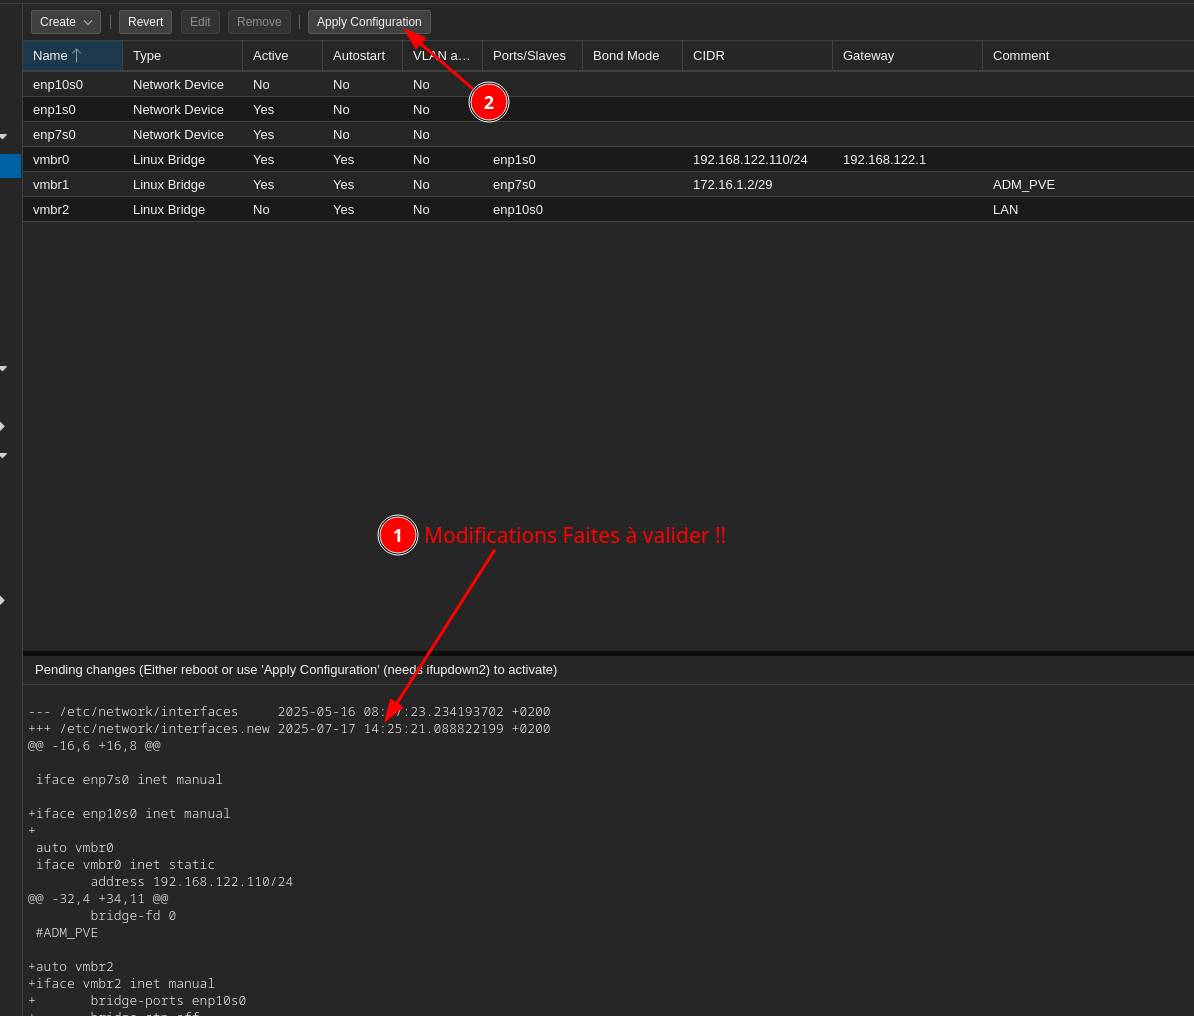](https://book.techoops.fr/uploads/images/gallery/2025-07/qm2image.png) 2. Faire les modifications sur tout les nœuds 3. Faire un test en faisant un PING entre deux VMs/LXC sur deux nœuds différents: ```bash root@test2:~# ping 172.16.1.2 -c 1 PING 172.16.1.2 (172.16.1.2) 56(84) bytes of data. 64 bytes from 172.16.1.2: icmp_seq=1 ttl=64 time=0.147 ms --- 172.16.1.2 ping statistics --- 1 packets transmitted, 1 received, 0% packet loss, time 0ms rtt min/avg/max/mdev = 0.147/0.147/0.147/0.000 ms ``` # 2- Automatisation # Création d'un template Cloudinit ### Création d'un template avec cloud init. 1. Se connecter à proxmox en SSH 2. Créer un dossier de travail: [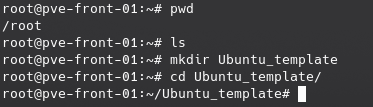](https://book.techoops.fr/uploads/images/gallery/2023-07/image.png) 3. Téléchargement du template au choix Debian ou Ubuntu: - Debian: ```bash wget https://cloud.debian.org/images/cloud/bookworm/latest/debian-12-generic-amd64.qcow2 ``` - Ubuntu: ```bash wget https://cloud-images.ubuntu.com/jammy/current/jammy-server-cloudimg-amd64.img ``` 4. Je télécharge Ubuntu, si l'Os choisi est Debian alors il faudra dézipper ce qu'on aura téléchargé: [](https://book.techoops.fr/uploads/images/gallery/2023-07/uXvimage.png) 5. On va customiser notre image: ```bash apt-get update && apt install -y libguestfs-tools ``` 1. 1. Installation de l'agent de liaison: ``` virt-customize -a jammy-server-cloudimg-amd64.img --install qemu-guest-agent ``` 2. Création d'un nouvel utilisateur: ``` virt-customize -a jammy-server-cloudimg-amd64.img --run-command 'useradd kvega' #changer le mot de passe du user créé virt-customize -a debian-12-generic-amd64.qcow2 --run-command 'echo "kvega:PASSWORD" | chpasswd' # Creation de son Home virt-customize -a jammy-server-cloudimg-amd64.img --run-command 'mkdir -p /home/kvega/.ssh' # Mise à jour des droits sur le home du user virt-customize -a jammy-server-cloudimg-amd64.img --run-command 'chown kvega:kvega /home/kvega' # Injection de la clé SSH pour la connexion virt-customize -a jammy-server-cloudimg-amd64.img --ssh-inject kvega:file:/root/.ssh/id_rsa.pub ``` 6. On va créer un template pour nos futurs machines: ```bash # CREATION DU TEMPLATE # Parametrage de la RAM et du CPU qm create 9001 --name 'Ubuntu22-Template' --memory 2048 --cores 2 --net0 virtio,bridge=vmbr0 # Import du disque Init dans le template qm importdisk 9001 jammy-server-cloudimg-amd64.img local-lvm # parametrage du disque qm set 9001 --scsihw virtio-scsi-pci --scsi0 local-lvm:vm-9001-disk-0 qm set 9001 --boot c --bootdisk scsi0 # Creation du volume cloudinit qm set 9001 --ide2 local-lvm:cloudinit # Create de la console (serial) qm set 9001 --serial0 socket --vga serial0 # Activation de l'agent qm set 9001 --agent enabled=1 #Transforamtion de la vm en template qm template 9001 ``` A cette étape on a un template de créé: [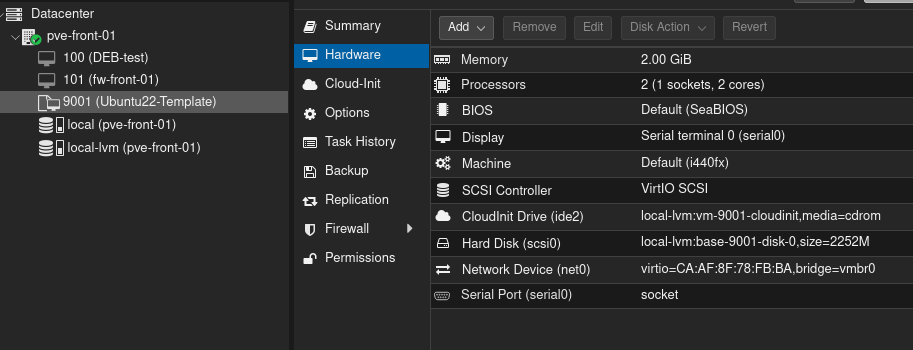](https://book.techoops.fr/uploads/images/gallery/2023-07/Ubximage.png) 7. On va tester la création d'une VM via le template: ```bash qm clone 9001 999 --name test-clone-cloud-init ``` 8. La VM est créée, on va modifier son IP et donner un mot de passe à notre utilisateur: [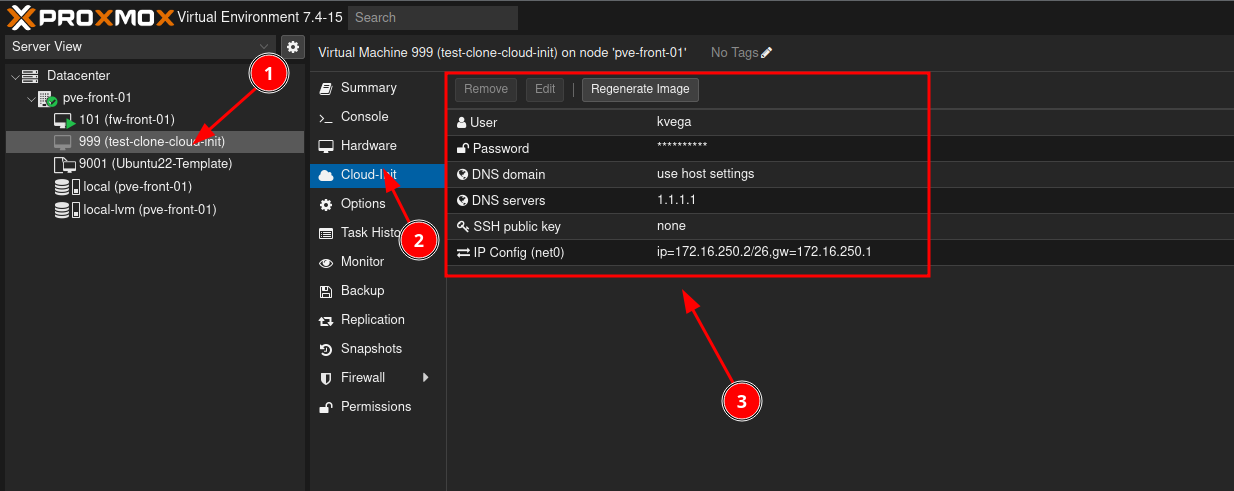](https://book.techoops.fr/uploads/images/gallery/2023-07/sD3image.png) # Création d'une VM Linux Avec Terraform 1. 1. Paramétrage de PROXMOX (création d'une clé d'API) [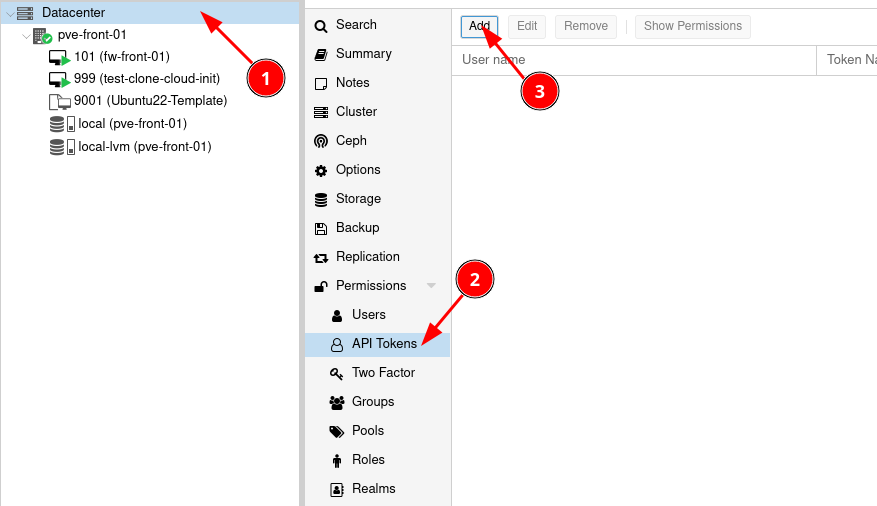](https://book.techoops.fr/uploads/images/gallery/2023-07/Ekcimage.png) [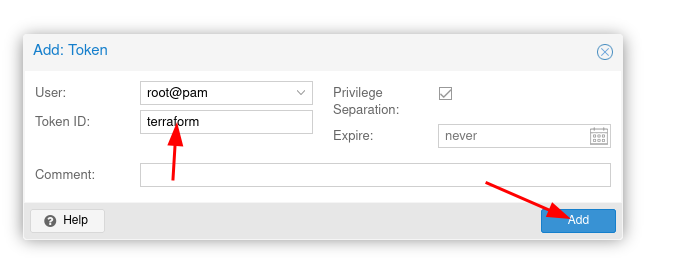](https://book.techoops.fr/uploads/images/gallery/2023-07/ofSimage.png) [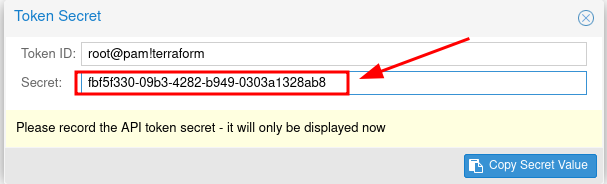](https://book.techoops.fr/uploads/images/gallery/2023-07/I3timage.png) **Attention Il faut bien noté le token !!** 2. Installation de TERRAFORM sur une DEBIAN (Créer un container de management) 1. Suivre la documentation officielle [https://developer.hashicorp.com/terraform/tutorials/aws-get-started/install-cli](https://developer.hashicorp.com/terraform/tutorials/aws-get-started/install-cli) 2. Vérifier l'installation de TERRAFORM: ```bash root@MGT-FRONT-01:~# terraform -v Terraform v1.5.2 on linux_amd64 ``` 3. Premier déploiement de machine 1. Créer un dossier de travail: ```bash mkdir VM_CREATION && cd VM_CREATION ``` 2. On va créer un fichier provider.tf ce fichier va référencer les module que nous utiliserons pour la création des VM. ``` # Creation du fichier provider.tf nano provider.tf ``` Contenu du fichier: ```bash terraform { required_providers { proxmox = { source = "telmate/proxmox" version = "2.7.4" } } } provider "proxmox" { # url de Proxmox pm_api_url = "https://192.168.1.179:8006/api2/json" # api token id is in the form of:source du provider terraform [PROVIDER-TERRAFORM](https://registry.terraform.io/providers/Telmate/proxmox/2.6.3/docs)
1. Initialisation du dossier: ```bash root@MGT-FRONT-01:~# terraform init Initializing the backend... Initializing provider plugins... - Finding latest version of telmate/proxmox... - Installing telmate/proxmox v2.9.14... - Installed telmate/proxmox v2.9.14 (self-signed, key ID A9EBBE091B35AFCE) Partner and community providers are signed by their developers. If you'd like to know more about provider signing, you can read about it here: https://www.terraform.io/docs/cli/plugins/signing.html Terraform has created a lock file .terraform.lock.hcl to record the provider selections it made above. Include this file in your version control repository so that Terraform can guarantee to make the same selections by default when you run "terraform init" in the future. Terraform has been successfully initialized! You may now begin working with Terraform. Try running "terraform plan" to see any changes that are required for your infrastructure. All Terraform commands should now work. If you ever set or change modules or backend configuration for Terraform, rerun this command to reinitialize your working directory. If you forget, other commands will detect it and remind you to do so if necessary. ``` 2. Planification du déploiement (Montre ce qui va être déployé): ```bash terraform plan ``` 3. On déploie réellement: ```bash terraform apply ``` On valide les modifications: ```bash Do you want to perform these actions? Terraform will perform the actions described above. Only 'yes' will be accepted to approve. Enter a value: yes ``` La VM a été créée: [](https://book.techoops.fr/uploads/images/gallery/2023-07/6LUimage.png) # Creation d'une VM linux avec opentofu ### Prérequis - Disposer d'un cluster proxmox valide - Avoir Opentofu d'installé - Avoir un serveur linux (Bastion) au seins du cluster avec un e paire de clé SSH de disponible ### Mise en place de la configuration (SSH) - Transférer la clé SSH publique sur le serveur proxmox - Sur le Serveur (Bastion) ```bash > cat .ssh/id_ed25519.pub ssh-ed25519 AAAAC3NzaC1lZDI1NTE5AAAAICqLxAZ0VeOyxKeDgxb9Gp7upKGs/w1+NrDRXcVYjLii root@adm-front-01 ``` - Sur le Proxmox ```bash root@pve-front-01:~# echo "ssh-ed25519 AAAAC3NzaC1lZDI1NTE5AAAAICqLxAZ0VeOyxKeDgxb9Gp7upKGs/w1+NrDRXcVYjLii root@adm-front-01" >> /root/.ssh/authorized_keys ``` - Test de la connexion depuis le serveur sur le proxmox ```bash ssh -q -o BatchMode=yes -o ConnectTimeout=5 root@$PVE_ADDRESS exit echo $? # Si le retour de la commande est différent de 0 la connexion est en echec ``` - Mise en place du fichier provider - créer le fichier provider.tf ```yaml terraform { required_providers { proxmox = { source = "bpg/proxmox" # --> https://registry.terraform.io/providers/bpg/proxmox/latest/docs version = "0.74.1" } } } provider "proxmox" { endpoint = "https://{PVE_ADDRESS}:8006" username = "root@pam" password = "{PVE_ROOT_PASSWORD}" insecure = true ssh { agent = true username = "root" node { name = "pve-front-01" address = "{PVE_ADDRESS}" port = 2222 # -> PVE SSH PORT } } } ```Lien vers le fichier [provider.tf](https://book.techoops.fr/attachments/1)
- Initialisation du provider ```bash > tofu init Initializing the backend... Initializing provider plugins... - Reusing previous version of bpg/proxmox from the dependency lock file - Using previously-installed bpg/proxmox v0.74.1 OpenTofu has been successfully initialized! You may now begin working with OpenTofu. Try running "tofu plan" to see any changes that are required for your infrastructure. All OpenTofu commands should now work. If you ever set or change modules or backend configuration for OpenTofu, rerun this command to reinitialize your working directory. If you forget, other commands will detect it and remind you to do so if necessary. ``` ### Mise en place des fichiers de configuration VMs - Téléchargement du fichier cloudinit via tofu - Créer le fichier file.tf ```yaml resource "proxmox_virtual_environment_file" "latest_debian_12" { content_type = "vztmpl" datastore_id = "local" node_name = "pve-front-01" source_file { path = "http://download.proxmox.com/images/system/debian-12-standard_12.7-1_amd64.tar.zst" } } ``` - Déclaration de la ressource Qemu (VM) - - Créer le fichier test\_qemu.tf ```yaml resource "proxmox_virtual_environment_vm" "test-qemu" { count = 1 name = "test-qemu-0${ count.index + 1 }" node_name = "pve-front-01" initialization { datastore_id = "local" dns { domain = "kvega.local" servers = ["1.1.1.1", "8.8.8.8"] } ip_config { ipv4 { address = "192.168.210.1${ count.index + 1 }/26" gateway = "192.168.210.1" # ou encore address = "192.168.1.100/24" } } user_account { # do not use this in production, configure your own ssh key instead! username = "admin" keys = ["ssh-ed25519 AAAAC3NzaC1lZDI1NTE5AAAAICqLxAZ0VeOyxKeDgxb9Gp7upKGs/w1+NrDRXcVYjLii root@adm-front-01", "ssh-ed25519 AAAAC3NzaC1lZDI1NTE5AAAAIJHXgvmOWJLUrFgmlVa49RdqYqUsyjVAQgAuBq7K7nis kvega@FR-LAP10398",] password = "Strongpassword" } } memory { dedicated = 4096 } cpu { cores = 2 type = "host" } network_device { bridge = "ovsbr2" model = "virtio" } lifecycle { ignore_changes = [ network_device, # on conserve l'adresse MAC pour éviter de régénérer la VM ] } operating_system { type = "l26" } disk { datastore_id = "local" file_id = proxmox_virtual_environment_file.debian_cloud_image.id interface = "virtio0" iothread = true discard = "on" size = 30 } } ``` ### Application des configurations Sur un terminal - Test de configuration - `tofu plan` --> permet de voire ce qui sera fait en quelque sorte un dry-run - `tofu apply` --> va appliquer les modification si vous entrez le mot yes à la fin # Proxmox BACKUP # Installation de Proxmox Backup Server #### CREATION DE LA VM 1. Télécharger l'[ISO](https://www.proxmox.com/en/downloads) 2. Créer la VM 1. Mettez 20 Go pour le disque dur 2. Ajouter un disque dur à la fin succeptible d'acceuillir les backups (100 Go) 3. Mettre le réseau sur le même que le PVE 4. Démarrer la VM 5. Installation de la VM [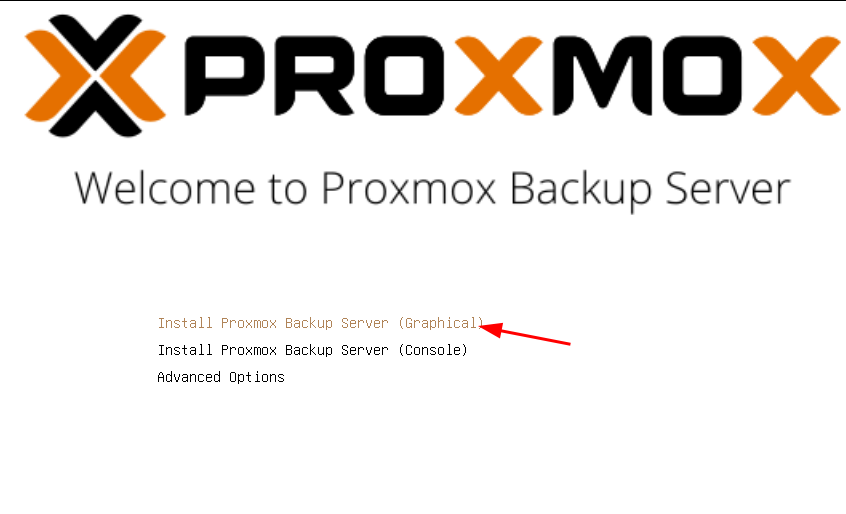](https://book.techoops.fr/uploads/images/gallery/2023-12/26zimage.png) [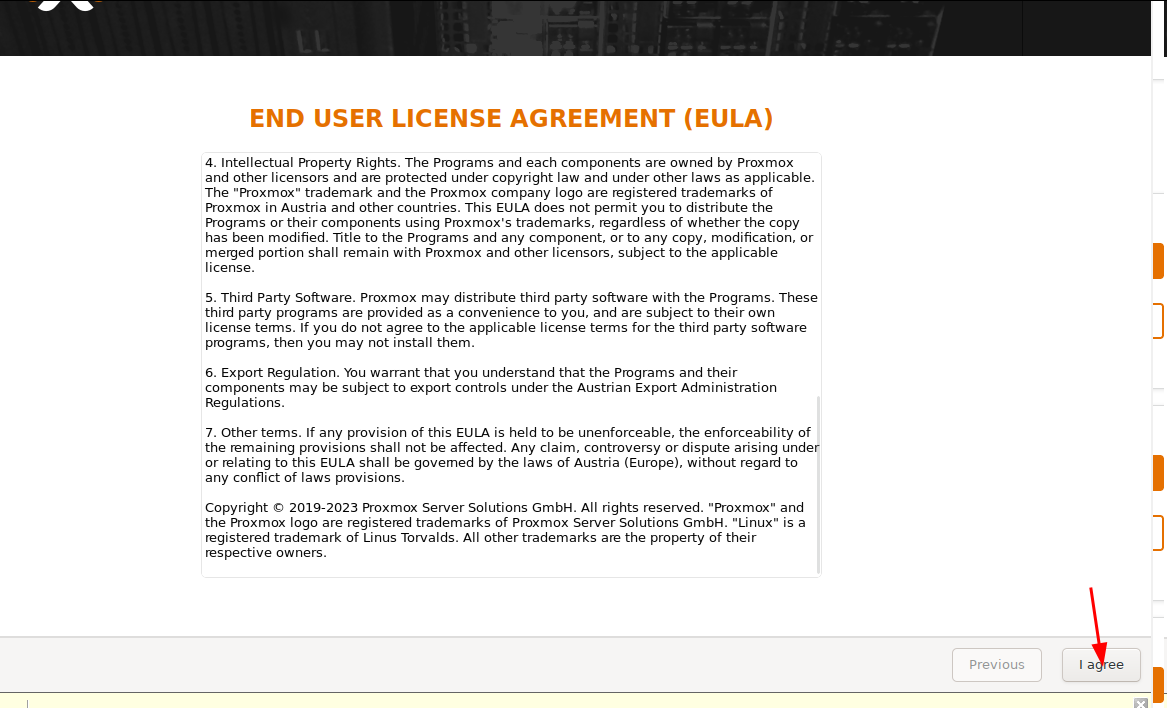](https://book.techoops.fr/uploads/images/gallery/2023-12/aLFimage.png) [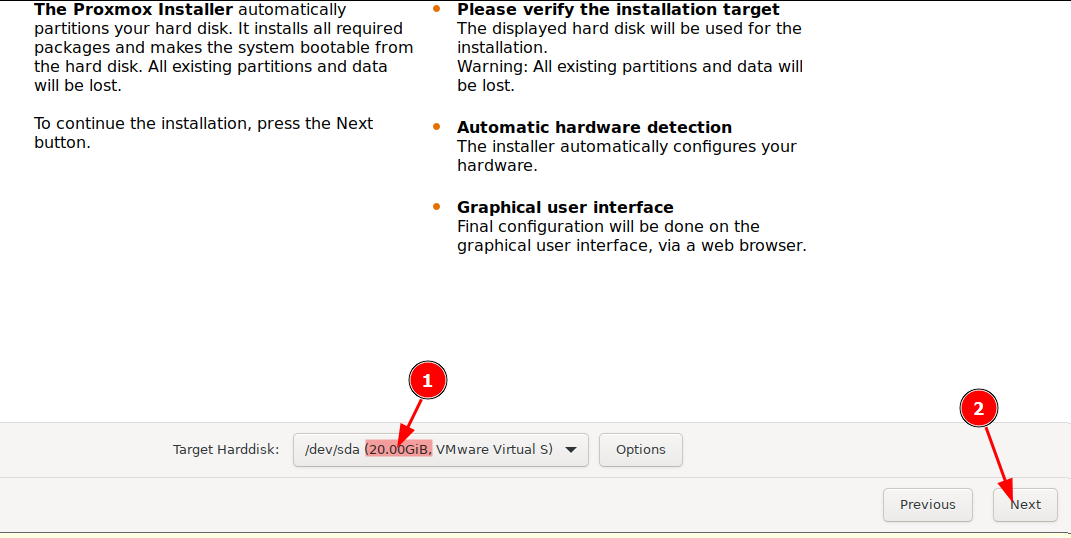](https://book.techoops.fr/uploads/images/gallery/2023-12/RFdimage.png) [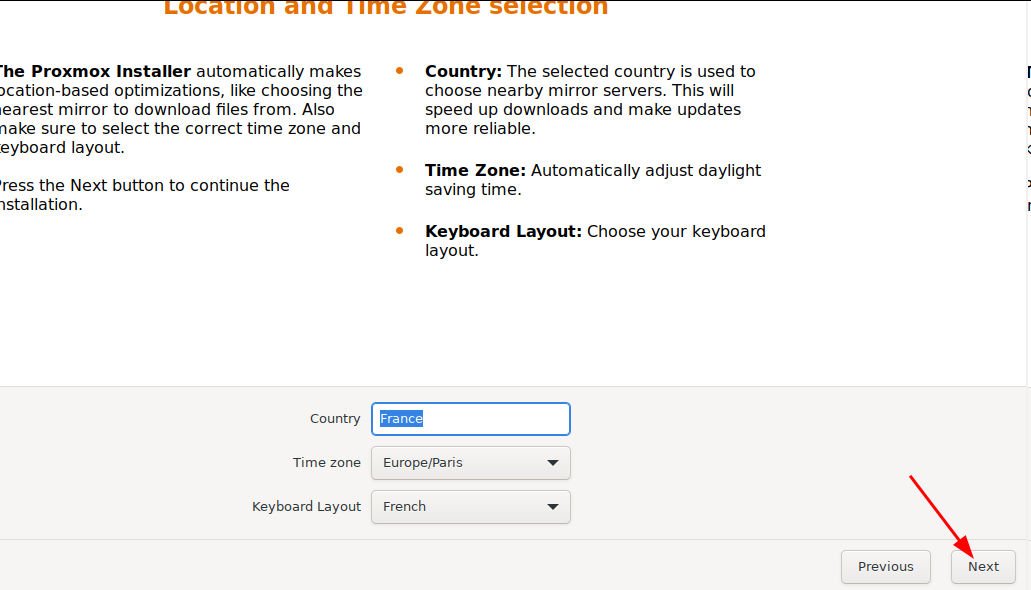](https://book.techoops.fr/uploads/images/gallery/2023-12/tEIimage.png) [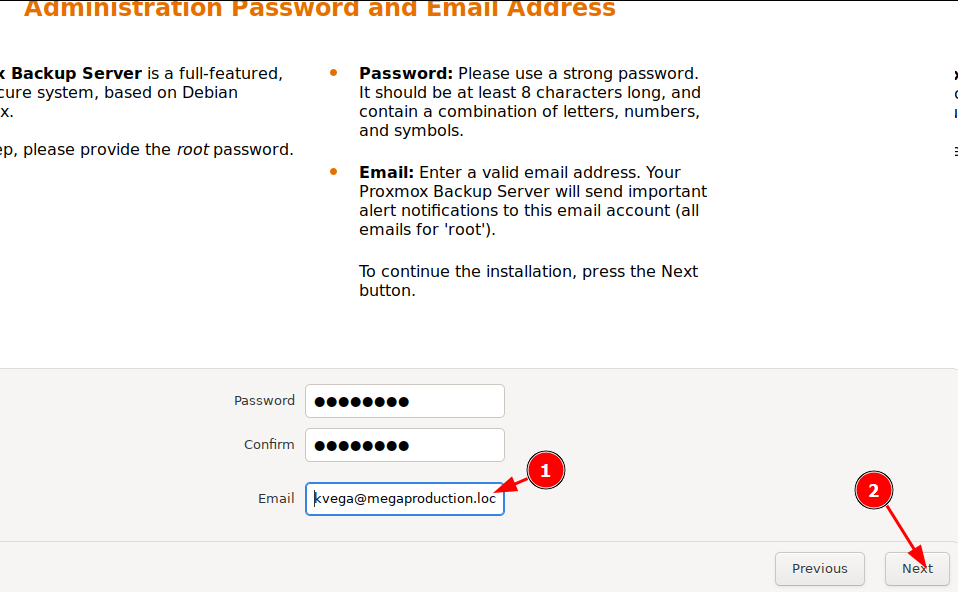](https://book.techoops.fr/uploads/images/gallery/2023-12/xNvimage.png) [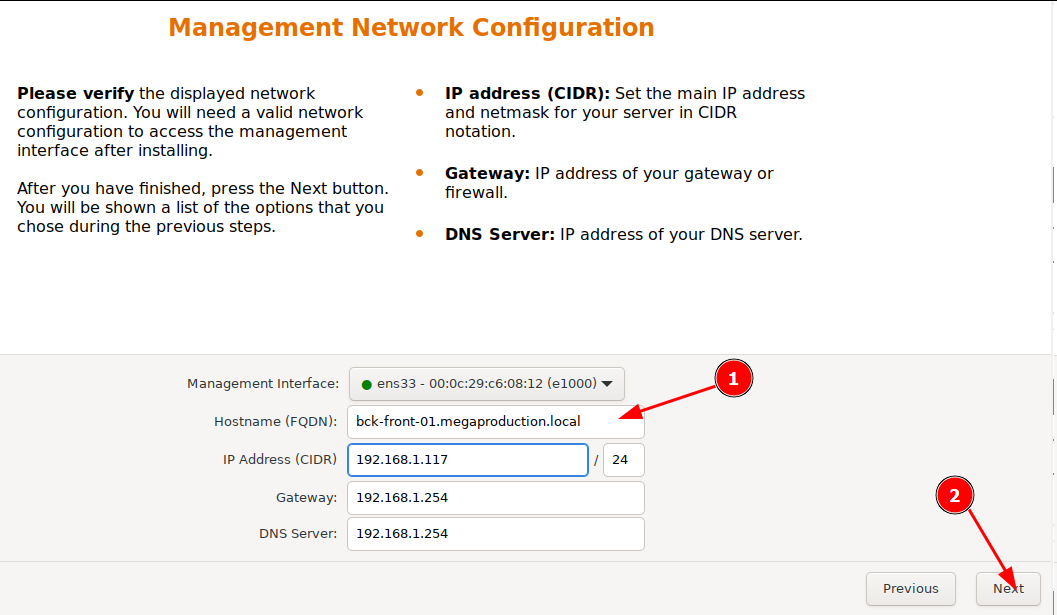](https://book.techoops.fr/uploads/images/gallery/2023-12/yinimage.png) [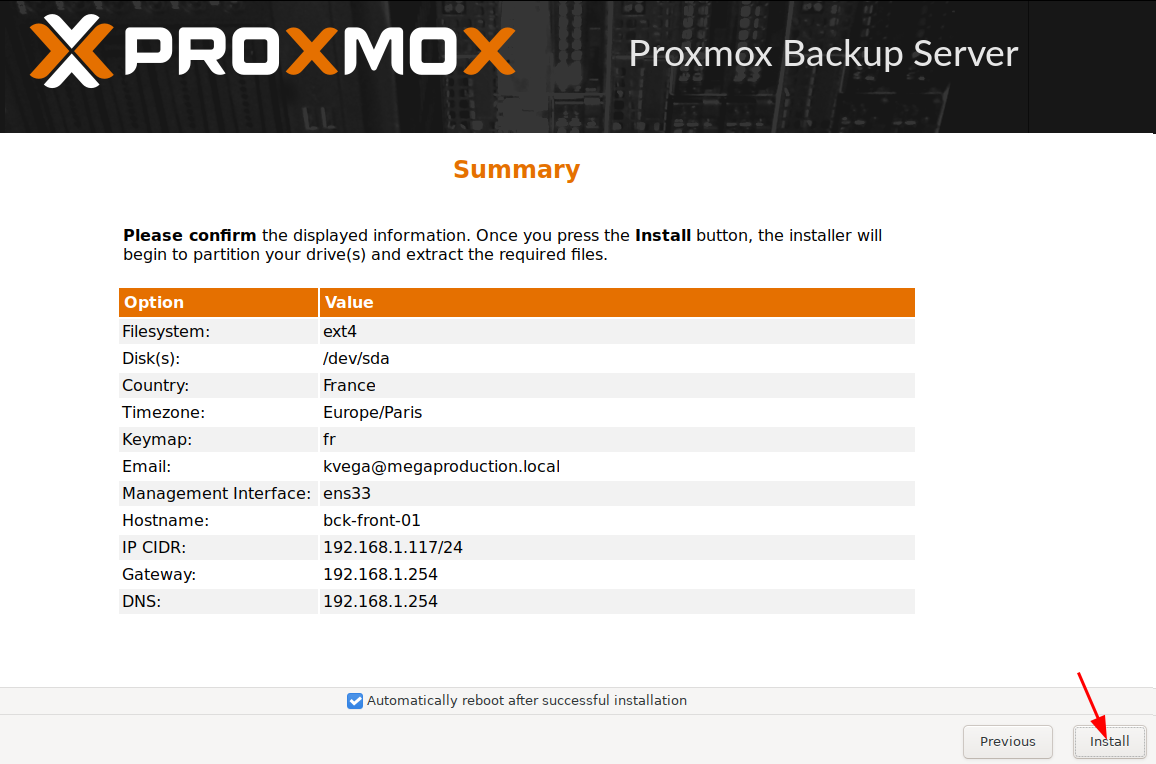](https://book.techoops.fr/uploads/images/gallery/2023-12/dD9image.png) 6. Le serveur est accèssible via l'IP configuré plus haut pour moi [https://192.168.1.117:8007](https://192.168.1.117:8007) [](https://book.techoops.fr/uploads/images/gallery/2023-12/94limage.png) #### Ajout d'un DATASTORE 1. S'assurer d'avoir un disque dur supplémentaire [](https://book.techoops.fr/uploads/images/gallery/2024-01/BfPimage.png) 2. Se connecter au serveur de backup en ssh 3. Lister les disque disponible ```bash root@bck-front-01:~# lsblk NAME MAJ:MIN RM SIZE RO TYPE MOUNTPOINTS sda 8:0 0 20G 0 disk ├─sda1 8:1 0 1007K 0 part ├─sda2 8:2 0 512M 0 part └─sda3 8:3 0 19.5G 0 part ├─pbs-swap 252:0 0 1.9G 0 lvm [SWAP] └─pbs-root 252:1 0 17.6G 0 lvm / sdb 8:16 0 100G 0 disk ``` Ici on vois bien mon disque de 100 Go je peux continuer 4. Créer un dossier qui nous servira de dossier de backup ```bash root@bck-front-01:~# mkdir /BACKUP root@bck-front-01:~# ls / |grep BACKUP BACKUP ``` 5. Créer la partition sur le disque, pour moi ce disque est sdb ```bash root@bck-front-01:~# fdisk /dev/sdb Welcome to fdisk (util-linux 2.38.1). Changes will remain in memory only, until you decide to write them. Be careful before using the write command. Device does not contain a recognized partition table. Created a new DOS (MBR) disklabel with disk identifier 0xc6692165. Command (m for help): n Partition type p primary (0 primary, 0 extended, 4 free) e extended (container for logical partitions) Select (default p): p Partition number (1-4, default 1): 1 First sector (2048-209715199, default 2048): Last sector, +/-sectors or +/-size{K,M,G,T,P} (2048-209715199, default 209715199): Created a new partition 1 of type 'Linux' and of size 100 GiB. Command (m for help): t Selected partition 1 Hex code or alias (type L to list all): 83 Changed type of partition 'Linux' to 'Linux'. Command (m for help): w ``` On vois que la nouvelle partition a été créée ```bash root@bck-front-01:~# lsblk NAME MAJ:MIN RM SIZE RO TYPE MOUNTPOINTS sda 8:0 0 20G 0 disk ├─sda1 8:1 0 1007K 0 part ├─sda2 8:2 0 512M 0 part └─sda3 8:3 0 19.5G 0 part ├─pbs-swap 252:0 0 1.9G 0 lvm [SWAP] └─pbs-root 252:1 0 17.6G 0 lvm / sdb 8:16 0 100G 0 disk └─sdb1 8:17 0 100G 0 part ``` 6. Formater la partition en ext4 ```bash root@bck-front-01:~# mkfs.ext4 -b 4096 /dev/sdb1 mke2fs 1.47.0 (5-Feb-2023) Creating filesystem with 26214144 4k blocks and 6553600 inodes Filesystem UUID: 5b339dd1-548b-4781-ae76-db130436f824 Superblock backups stored on blocks: 32768, 98304, 163840, 229376, 294912, 819200, 884736, 1605632, 2654208, 4096000, 7962624, 11239424, 20480000, 23887872 Allocating group tables: done Writing inode tables: done Creating journal (131072 blocks): done Writing superblocks and filesystem accounting information: done ``` 7. Monter la partition sur le serveur: 1. Editer le fichier `/etc/fstab` 2. Ajouter la ligne suivante en fin de fichier: `/dev/sdb1 /BACKUP ext4 defaults` 3. Monter le volume: `mount -a ` 4. Vérifier si disques est bien monté: ```bash root@bck-front-01:~# cat /etc/fstab #