# 2- Automatisation

# Création d'un template Cloudinit

### Création d'un template avec cloud init.  


1. Se connecter à proxmox en SSH
2. Créer un dossier de travail:  
    [![image.png](https://book.techoops.fr/uploads/images/gallery/2023-07/scaled-1680-/image.png)](https://book.techoops.fr/uploads/images/gallery/2023-07/image.png)
3. Téléchargement du template au choix Debian ou Ubuntu: 
    - Debian:   
        ```bash
         wget https://cloud.debian.org/images/cloud/bookworm/latest/debian-12-generic-amd64.qcow2
        ```
    - Ubuntu:  
        ```bash
        wget https://cloud-images.ubuntu.com/jammy/current/jammy-server-cloudimg-amd64.img
        ```
4. Je télécharge Ubuntu, si l'Os choisi est Debian alors il faudra dézipper ce qu'on aura téléchargé:  
    [![image.png](https://book.techoops.fr/uploads/images/gallery/2023-07/scaled-1680-/uXvimage.png)](https://book.techoops.fr/uploads/images/gallery/2023-07/uXvimage.png)
5. On va customiser notre image:  
    ```bash
    apt-get update && apt install -y libguestfs-tools
    ```


    1. 1. Installation de l'agent de liaison:  
            ```
            virt-customize -a jammy-server-cloudimg-amd64.img --install qemu-guest-agent
            ```
        2. Création d'un nouvel utilisateur:  
            ```
             virt-customize -a jammy-server-cloudimg-amd64.img  --run-command 'useradd kvega'
            #changer le mot de passe du user créé
            virt-customize -a debian-12-generic-amd64.qcow2 --run-command 'echo "kvega:PASSWORD" | chpasswd'
            # Creation de son Home
             virt-customize -a jammy-server-cloudimg-amd64.img  --run-command 'mkdir -p /home/kvega/.ssh'
            # Mise à jour des droits sur le home du user
            virt-customize -a jammy-server-cloudimg-amd64.img --run-command 'chown kvega:kvega /home/kvega'
            # Injection de la clé SSH pour la connexion
            virt-customize -a jammy-server-cloudimg-amd64.img --ssh-inject kvega:file:/root/.ssh/id_rsa.pub
            ```
6. On va créer un template pour nos futurs machines:  
    ```bash
    # CREATION DU TEMPLATE
    # Parametrage de la RAM et du CPU
    qm create 9001 --name 'Ubuntu22-Template' --memory 2048 --cores 2 --net0 virtio,bridge=vmbr0
    # Import du disque Init dans le template
    qm importdisk 9001 jammy-server-cloudimg-amd64.img local-lvm
    # parametrage du disque
    qm set 9001 --scsihw virtio-scsi-pci --scsi0 local-lvm:vm-9001-disk-0
    qm set 9001 --boot c --bootdisk scsi0
    # Creation du volume cloudinit
    qm set 9001 --ide2 local-lvm:cloudinit
    # Create de la console (serial)
    qm set 9001 --serial0 socket --vga serial0
    # Activation de l'agent
    qm set 9001 --agent enabled=1
    #Transforamtion de la vm en template
    qm template 9001
    ```
    
    A cette étape on a un template de créé:
    
    [![image.png](https://book.techoops.fr/uploads/images/gallery/2023-07/scaled-1680-/Ubximage.png)](https://book.techoops.fr/uploads/images/gallery/2023-07/Ubximage.png)
7. On va tester la création d'une VM via le template:  
    ```bash
    qm clone 9001 999 --name test-clone-cloud-init
    ```
8. La VM est créée, on va modifier son IP et donner un mot de passe à notre utilisateur:
    
    [![image.png](https://book.techoops.fr/uploads/images/gallery/2023-07/scaled-1680-/sD3image.png)](https://book.techoops.fr/uploads/images/gallery/2023-07/sD3image.png)

# Création d'une VM Linux Avec Terraform

1. 1. Paramétrage de PROXMOX (création d'une clé d'API)  
        [![image.png](https://book.techoops.fr/uploads/images/gallery/2023-07/scaled-1680-/Ekcimage.png)](https://book.techoops.fr/uploads/images/gallery/2023-07/Ekcimage.png)
        
        [![image.png](https://book.techoops.fr/uploads/images/gallery/2023-07/scaled-1680-/ofSimage.png)](https://book.techoops.fr/uploads/images/gallery/2023-07/ofSimage.png)
        
        [![image.png](https://book.techoops.fr/uploads/images/gallery/2023-07/scaled-1680-/I3timage.png)](https://book.techoops.fr/uploads/images/gallery/2023-07/I3timage.png)  
        <span style="background-color: rgb(255, 255, 255); color: rgb(224, 62, 45);">**Attention Il faut bien noté le token !!**</span>
    2. <span style="background-color: rgb(255, 255, 255); color: rgb(0, 0, 0);"> Installation de TERRAFORM sur une DEBIAN (Créer un container de management)</span>
        1. <span style="background-color: rgb(255, 255, 255); color: rgb(0, 0, 0);">Suivre la documentation officielle [https://developer.hashicorp.com/terraform/tutorials/aws-get-started/install-cli](https://developer.hashicorp.com/terraform/tutorials/aws-get-started/install-cli)</span>
        2. <span style="background-color: rgb(255, 255, 255); color: rgb(0, 0, 0);"><span style="background-color: rgb(255, 255, 255); color: rgb(0, 0, 0);">Vérifier l'installation de TERRAFORM:  
            </span></span>```bash
            root@MGT-FRONT-01:~# terraform -v
            Terraform v1.5.2
            on linux_amd64
            ```
    3. Premier déploiement de machine 
        1. Créer un dossier de travail:  
            ```bash
            mkdir VM_CREATION && cd VM_CREATION
            ```
        2. On va créer un fichier provider.tf ce fichier va référencer les module que nous utiliserons pour la création des VM.  
            ```
            # Creation du fichier provider.tf
            nano provider.tf
            ```
            
            Contenu du fichier:
            
            ```bash
            terraform {
              required_providers {
                proxmox = {
                  source = "telmate/proxmox"
                  version = "2.7.4"
                }
              }
            }
            provider "proxmox" {
              # url de Proxmox
              pm_api_url = "https://192.168.1.179:8006/api2/json"
              # api token id is in the form of: <username>@pam!<tokenId>
              pm_tls_insecure = true
              pm_parallel = 2
              pm_user="root@pam"
              pm_password="Espoir15"
            }
            ```
        3. On créer le fichier web.tf:  
            ```bash
            nano web.tf
            ```
            
            Contenu du fichier:
            
            ```bash
            resource "proxmox_vm_qemu" "web-server-1" {
              count = 1
              name = "web-front-01"
              target_node = "pve-front-01"
              vmid = "0"
              clone = "Ubuntu22-Template"
              full_clone = "true"
              agent = 1
              os_type = "cloud-init"
              cores = 1
              sockets = 1
              cpu = "kvm64"
              oncreate = true
            
              memory = 1024
              scsihw = "virtio-scsi-pci"
              bootdisk = "scsi0"
              disk {
                slot = 0
                size = "8G"
                type = "scsi"
                storage = "local-lvm"
                iothread = 0
              }
            
              network {
                model = "virtio"
                bridge = "vmbr1"
              }
            
              lifecycle {
                ignore_changes = [
                  network,
                ]
              }
            
              ipconfig0 = "ip=172.16.250.3/24,gw=172.16.250.1"
              #Si vous avez des clés SSH vous pouvez les mettre ici
              sshkeys = <<EOF
                ssh-ed25519 AAAAC3NzaC1lZDI1NTE5AAAAIIeq/iHCth8j1aKG/DMq0rd3bveLgqksAkwBOhYgAFG1 kvega@fr-lap10398
              EOF
            }
            ```
            
            <p class="callout info">source du provider terraform [PROVIDER-TERRAFORM](https://registry.terraform.io/providers/Telmate/proxmox/2.6.3/docs)  
            </p>
            
            
            1. Initialisation du dossier:  
                ```bash
                root@MGT-FRONT-01:~# terraform init 
                
                Initializing the backend...
                
                Initializing provider plugins...
                - Finding latest version of telmate/proxmox...
                - Installing telmate/proxmox v2.9.14...
                - Installed telmate/proxmox v2.9.14 (self-signed, key ID A9EBBE091B35AFCE)
                
                Partner and community providers are signed by their developers.
                If you'd like to know more about provider signing, you can read about it here:
                https://www.terraform.io/docs/cli/plugins/signing.html
                
                Terraform has created a lock file .terraform.lock.hcl to record the provider
                selections it made above. Include this file in your version control repository
                so that Terraform can guarantee to make the same selections by default when
                you run "terraform init" in the future.
                
                Terraform has been successfully initialized!
                
                You may now begin working with Terraform. Try running "terraform plan" to see
                any changes that are required for your infrastructure. All Terraform commands
                should now work.
                
                If you ever set or change modules or backend configuration for Terraform,
                rerun this command to reinitialize your working directory. If you forget, other
                commands will detect it and remind you to do so if necessary.
                ```
            2. Planification du déploiement (Montre ce qui va être déployé):  
                ```bash
                terraform plan
                ```
            3. On déploie réellement:
                
                ```bash
                terraform apply 
                ```
                
                On valide les modifications:
                
                ```bash
                Do you want to perform these actions?
                  Terraform will perform the actions described above.
                  Only 'yes' will be accepted to approve.
                
                  Enter a value: yes
                ```
                
                La VM a été créée:
                
                [![image.png](https://book.techoops.fr/uploads/images/gallery/2023-07/scaled-1680-/6LUimage.png)](https://book.techoops.fr/uploads/images/gallery/2023-07/6LUimage.png)

# Création d'un container Linux Avec Terraform

1. 1. Paramétrage de PROXMOX (création d'une clé d'API)  
        [![image.png](https://book.techoops.fr/uploads/images/gallery/2023-07/scaled-1680-/Ekcimage.png)](https://book.techoops.fr/uploads/images/gallery/2023-07/Ekcimage.png)
        
        [![image.png](https://book.techoops.fr/uploads/images/gallery/2023-07/scaled-1680-/ofSimage.png)](https://book.techoops.fr/uploads/images/gallery/2023-07/ofSimage.png)
        
        [![image.png](https://book.techoops.fr/uploads/images/gallery/2023-07/scaled-1680-/I3timage.png)](https://book.techoops.fr/uploads/images/gallery/2023-07/I3timage.png)  
        <span style="background-color: rgb(255, 255, 255); color: rgb(224, 62, 45);">**Attention Il faut bien noté le token !!**</span>
    2. <span style="background-color: rgb(255, 255, 255); color: rgb(0, 0, 0);"> Installation de TERRAFORM sur une DEBIAN (Créer un container de management)</span>
        1. <span style="background-color: rgb(255, 255, 255); color: rgb(0, 0, 0);">Suivre la documentation officielle [https://developer.hashicorp.com/terraform/tutorials/aws-get-started/install-cli](https://developer.hashicorp.com/terraform/tutorials/aws-get-started/install-cli)</span>
        2. <span style="background-color: rgb(255, 255, 255); color: rgb(0, 0, 0);"><span style="background-color: rgb(255, 255, 255); color: rgb(0, 0, 0);">Vérifier l'installation de TERRAFORM:  
            </span></span>```bash
            root@MGT-FRONT-01:~# terraform -v
            Terraform v1.5.2
            on linux_amd64
            ```
    3. Premier déploiement de machine 
        1. Créer un dossier de travail:  
            ```bash
            mkdir VM_CREATION && cd VM_CREATION
            ```
        2. On va créer un fichier provider.tf ce fichier va référencer les module que nous utiliserons pour la création des VM.  
            ```
            # Creation du fichier provider.tf
            nano provider.tf
            ```
            
            Contenu du fichier:
            
            ```bash
            terraform {
              required_providers {
                proxmox = {
                  source = "telmate/proxmox"
            #      version = "2.7.4"
                }
              }
            }
            provider "proxmox" {
              # url de Proxmox
              pm_api_url = "https://192.168.1.179:8006/api2/json"
              # api token id is in the form of: <username>@pam!<tokenId>
              pm_tls_insecure = true
              pm_parallel = 2
              pm_user="root@pam"
              pm_password="Espoir15"
            }
            ```
        3. On créer le fichier web.tf:  
            ```bash
            nano web.tf
            ```
            
            Contenu du fichier:
            
            ```bash
            resource "proxmox_lxc" "web" {
              #count        = 2
              count        = 1
              target_node  = "pve-front-01"
              hostname     = "web-front-0${count.index + 1}"
              start        = true
              ostemplate   = "/mnt/pve/ISOs/template/cache/debian-12-standard_12.0-1_amd64.tar.zst"
              unprivileged = true
              ostype       = "debian"
              nameserver   = "172.16.0.3 172.16.0.4 1.1.1.1"
              onboot       = true
              searchdomain = "megaproduction.local"
              memory       = "512"
            #  pool         = "BTS2"
              cores        = "1"
            
              ssh_public_keys = <<-EOT
                ssh-ed25519 AAAAC3NzaC1lZDI1NTE5AAAAIHGQDKDGsODUESc5SWLCK0W2/5yAg/xdrXtVCtgE170H root@adm-front-01
                ssh-ed25519 AAAAC3NzaC1lZDI1NTE5AAAAIIeq/iHCth8j1aKG/DMq0rd3bveLgqksAkwBOhYgAFG1 kvega@fr-lap10398
              EOT
               
              // Terraform will crash without rootfs defined
              rootfs {
                storage = "VMs_HDD"
                size    = "8G"
              }
            
              features {
                fuse    = true
                nesting = true
                mount   = "nfs;cifs"
              }
            
              network {
                name   = "eth0"
                bridge = "vmbr2"
                #ip     = "10.10.10.${2 + count.index + 1}/26"
                ip     = "10.10.10.1/26"
                gw     = "10.10.10.1"
              }
            }
            ```
            
            <p class="callout info">source du provider terraform [PROVIDER-TERRAFORM](https://registry.terraform.io/providers/Telmate/proxmox/2.6.3/docs)  
            </p>
            
            
            1. Initialisation du dossier:  
                ```bash
                root@MGT-FRONT-01:~# terraform init 
                
                Initializing the backend...
                
                Initializing provider plugins...
                - Finding latest version of telmate/proxmox...
                - Installing telmate/proxmox v2.9.14...
                - Installed telmate/proxmox v2.9.14 (self-signed, key ID A9EBBE091B35AFCE)
                
                Partner and community providers are signed by their developers.
                If you'd like to know more about provider signing, you can read about it here:
                https://www.terraform.io/docs/cli/plugins/signing.html
                
                Terraform has created a lock file .terraform.lock.hcl to record the provider
                selections it made above. Include this file in your version control repository
                so that Terraform can guarantee to make the same selections by default when
                you run "terraform init" in the future.
                
                Terraform has been successfully initialized!
                
                You may now begin working with Terraform. Try running "terraform plan" to see
                any changes that are required for your infrastructure. All Terraform commands
                should now work.
                
                If you ever set or change modules or backend configuration for Terraform,
                rerun this command to reinitialize your working directory. If you forget, other
                commands will detect it and remind you to do so if necessary.
                ```
            2. Planification du déploiement (Montre ce qui va être déployé):  
                ```bash
                terraform plan
                ```
            3. On déploie réellement:
                
                ```bash
                terraform apply 
                ```
                
                On valide les modifications:
                
                ```bash
                Do you want to perform these actions?
                  Terraform will perform the actions described above.
                  Only 'yes' will be accepted to approve.
                
                  Enter a value: yes
                ```
                
                La VM a été créée:
                
                [![image.png](https://book.techoops.fr/uploads/images/gallery/2023-07/scaled-1680-/6LUimage.png)
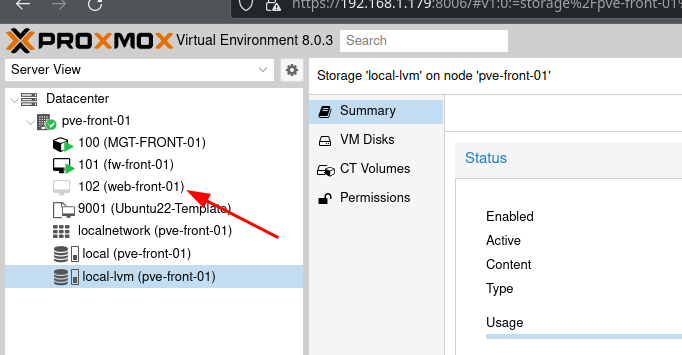
](https://book.techoops.fr/uploads/images/gallery/2023-07/6LUimage.png)

# Creation d'une VM linux avec opentofu

### Prérequis

- Disposer d'un cluster proxmox valide
- Avoir Opentofu d'installé
- Avoir un serveur linux (Bastion) au seins du cluster avec un e paire de clé SSH de disponible

### Mise en place de la configuration (SSH)

- Transférer la clé SSH publique sur le serveur proxmox 
    - Sur le Serveur (Bastion)  
        ```bash
        > cat .ssh/id_ed25519.pub
        ssh-ed25519 AAAAC3NzaC1lZDI1NTE5AAAAICqLxAZ0VeOyxKeDgxb9Gp7upKGs/w1+NrDRXcVYjLii root@adm-front-01
        ```
    - Sur le Proxmox  
        ```bash
        root@pve-front-01:~# echo "ssh-ed25519 AAAAC3NzaC1lZDI1NTE5AAAAICqLxAZ0VeOyxKeDgxb9Gp7upKGs/w1+NrDRXcVYjLii root@adm-front-01" >> /root/.ssh/authorized_keys
        ```
    - Test de la connexion depuis le serveur sur le proxmox  
        ```bash
        ssh -q -o BatchMode=yes -o ConnectTimeout=5 root@$PVE_ADDRESS exit
        echo $?
        # Si le retour de la commande est différent de 0 la connexion est en echec
        ```
- Mise en place du fichier provider 
    - créer le fichier provider.tf  
        ```yaml
        terraform {
            required_providers {
            proxmox = {
              source = "bpg/proxmox" # --> https://registry.terraform.io/providers/bpg/proxmox/latest/docs
              version = "0.74.1"
            }
          }
        }
        
        provider "proxmox" {
          endpoint = "https://{PVE_ADDRESS}:8006"
          username = "root@pam"
          password = "{PVE_ROOT_PASSWORD}"
          insecure = true
        
          ssh {
            agent = true
            username = "root"
        
            node {
              name = "pve-front-01"
              address = "{PVE_ADDRESS}"
              port = 2222 # -> PVE SSH PORT
            }
          }
        }
        
        ```
        
        <p class="callout info align-center">Lien vers le fichier [provider.tf](https://book.techoops.fr/attachments/1)</p>
- Initialisation du provider  
    ```bash
    > tofu init
    
    Initializing the backend...
    
    Initializing provider plugins...
    - Reusing previous version of bpg/proxmox from the dependency lock file
    - Using previously-installed bpg/proxmox v0.74.1
    
    OpenTofu has been successfully initialized!
    
    You may now begin working with OpenTofu. Try running "tofu plan" to see
    any changes that are required for your infrastructure. All OpenTofu commands
    should now work.
    
    If you ever set or change modules or backend configuration for OpenTofu,
    rerun this command to reinitialize your working directory. If you forget, other
    commands will detect it and remind you to do so if necessary.
    ```

### Mise en place des fichiers de configuration VMs

- Téléchargement du fichier cloudinit via tofu  
    
    - Créer le fichier file.tf  
        ```yaml
        resource "proxmox_virtual_environment_file" "latest_debian_12" {
          content_type = "vztmpl"
          datastore_id = "local"
          node_name = "pve-front-01"
          source_file {
            path = "http://download.proxmox.com/images/system/debian-12-standard_12.7-1_amd64.tar.zst"
          }
        }
        ```
- Déclaration de la ressource Qemu (VM) 
    - - Créer le fichier test\_qemu.tf  
            ```yaml
            resource "proxmox_virtual_environment_vm" "test-qemu" {
              count = 1
              name      = "test-qemu-0${ count.index + 1 }"
              node_name = "pve-front-01"
            
              initialization {
                datastore_id = "local"
                dns {
                  domain = "kvega.local"
                  servers = ["1.1.1.1", "8.8.8.8"]
                }
                ip_config {
                  ipv4 {
                    address = "192.168.210.1${ count.index + 1 }/26"
                    gateway = "192.168.210.1"
                    # ou encore address = "192.168.1.100/24"
                  }
                }
                user_account {
                  # do not use this in production, configure your own ssh key instead!
                  username = "admin"
                  keys  = ["ssh-ed25519 AAAAC3NzaC1lZDI1NTE5AAAAICqLxAZ0VeOyxKeDgxb9Gp7upKGs/w1+NrDRXcVYjLii root@adm-front-01",
                    "ssh-ed25519 AAAAC3NzaC1lZDI1NTE5AAAAIJHXgvmOWJLUrFgmlVa49RdqYqUsyjVAQgAuBq7K7nis kvega@FR-LAP10398",]
                  password = "Strongpassword"
                }
            
              }
            
              memory {
                  dedicated = 4096
              }
            
              cpu {
                  cores = 2
                  type = "host"
              }
            
              network_device {
                  bridge = "ovsbr2"
                  model = "virtio"
              }
            
              lifecycle {
                ignore_changes = [
                  network_device, # on conserve l'adresse MAC pour éviter de régénérer la VM
                ]
              }
            
              operating_system {
                type = "l26"
              }
            
              disk {
                datastore_id = "local"
                file_id      = proxmox_virtual_environment_file.debian_cloud_image.id
                interface    = "virtio0"
                iothread     = true
                discard      = "on"
                size         = 30
              }
            }
            ```

### Application des configurations

Sur un terminal

- Test de configuration 
    - `tofu plan` --&gt; permet de voire ce qui sera fait en quelque sorte un dry-run
    - `tofu apply` --&gt; va appliquer les modification si vous entrez le mot yes à la fin